Don’t want to read though this post? Just want the code, go get it from my github repo!
I’ve been meaning to start working with Cortex-M3 processors for a few of my projects. Sometimes the MSP430’s I usually use just aren’t fast enough. :-)
Previously, I’ve used the mbed, which is a nice Cortex-M3(LPC1768) development board. The best part about it is that you program it by just copying the bin file to it as if it was a flash drive. It takes care of the actual device programming for you. The downside is that you don’t have any debugging capabilities, and that you have to use their online compiler.
If you haven’t heard about my ‘home automation’ project, you should probably read this first.
This weekend was rather productive. I managed to get my light alarm working! I wrote escheduler, which is something like crond, but calls functions, instead of running programs. It’s also more limited, since it only schedules events on a weekly basis.
Escheduler runs on the beaglebone, which is currently my ‘home server’. The current set-up turns on the light behind my bed a few minutes before I’m supposed to wake up. Eventually there will be a whole fade-in period, but I just wanted to get something working. I left it running overnight, and sure enough, the lights turned on on time this morning!
I’ve been neglecting my projects for a while, but I finally decided to stop being lazy and started working on them again. Several of my old posts deal with msp430’s and cc2500’s, but they’re mostly hardware updates and examples of changing lights to music. Now that I have a semi-stable platform and decent libraries, I figured I might as well do something useful with them.
My ’end goal’ is to be able to control things like lighting and temperature automatically(and/or remotely) as well as gather data about the environment(temperature, motion, air quality, etc.) As usual, the first thing I did was start designing the whole system in my head and over-complicating things. I wanted to do a fancy server with flexible communications protocols, which got overwhelming pretty fast. After some time without getting anything done, I decided to start fresh and do small, manageable, tasks that eventually will end up being the full working system.
I recently found out that the San Francisco International Airport (SFO) offers bike parking for up to 14 days. I decided to try it out during the thanksgiving break just for fun (with the added bonus of saving on driving/parking or taxi costs).
The San Jose airport is much closer to where I live (San Jose/Cupertino area), but SFO has more direct flights to where I need to go. SFO is over 40 miles from my apartment, so the trip did require some planning. First of all, I had to reduce the amount of luggage I packed, since I was going to be carrying it on my back. I can’t predict if it’s going to be raining or not, so I decided to use a waterproof backpack. Finally, I didn’t want to bike all 40 miles, so I only biked to/from CalTrain stations and took the train the rest of the way.
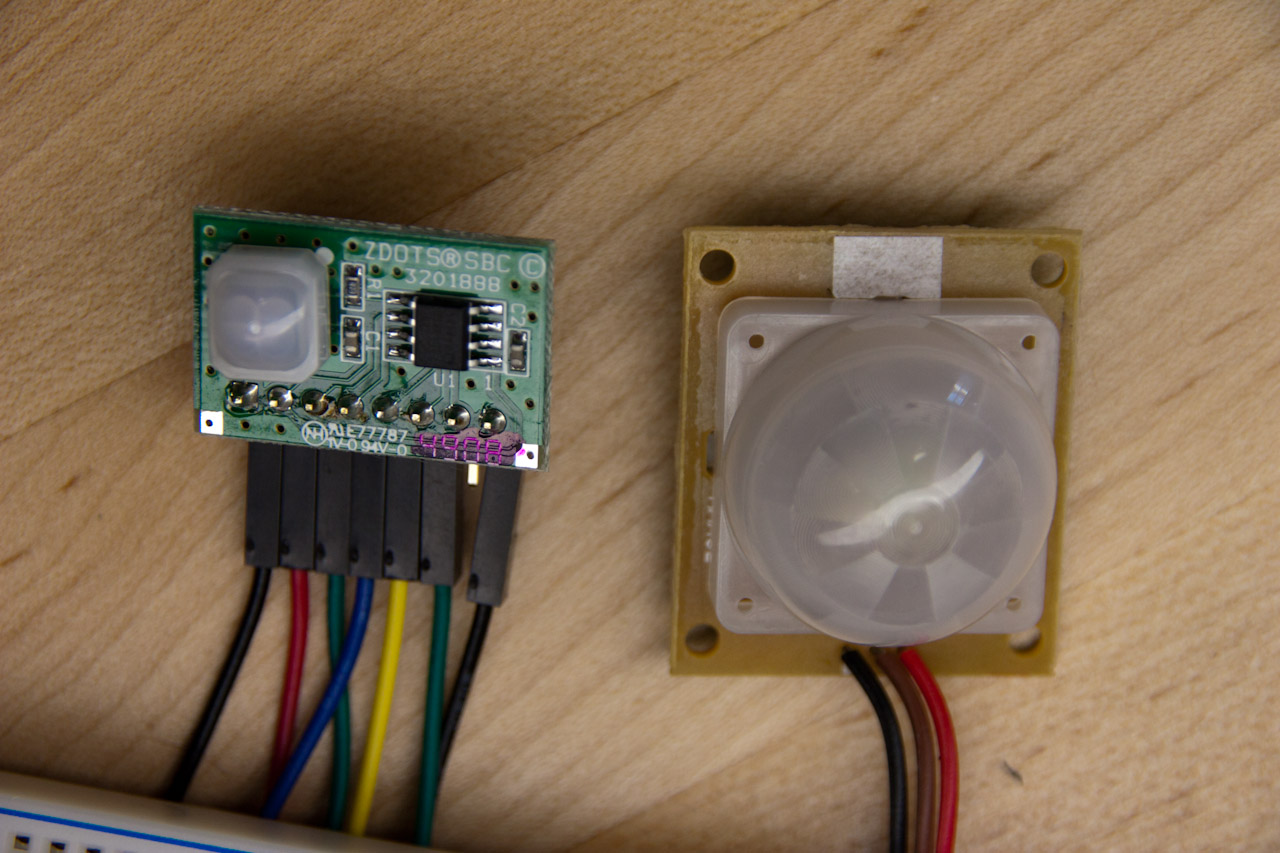
I recently started working on a project that might require some Passive Infra-red (PIR) sensors. Sparkfun had two different ones, so I figured I’d try them both.
The comparison is between a Zilog ePIR and an SE-10. One very important thing to note is that I did not use the ePIR’s serial interface. I only used the hardware interface, set to the highest sensitivity, and shortest delay. I felt that this would be a better comparison. I made a video that shows my test setup, as well as some results, so most of the relevant information is there. I’ll use this blog post to add some setup details, as well as my conclusion.
The Wireless Friend Finder was my project for the Bring-a-Hack dinner after the 2012 Bay Area Maker Faire. I made it in a hurry, so it’s not terribly well documented.
The wireless friend finder is a device that will start buzzing when another device gets near. This can be used to find a friend in a crowd(or to stay away from someone you don’t like)! Here’s a quick video I did while I was prototyping the project.
I finally decided to get a dedicated electronics workbench. I had been working on my computer desk until now, but it wasn’t quite working out. The first problem was having to clean up my electronics gear all the time, so I could have space to work comfortably and have other stuff out. The second was that it’s a glass desk, so I had to be really careful not to break it (No hammers!).
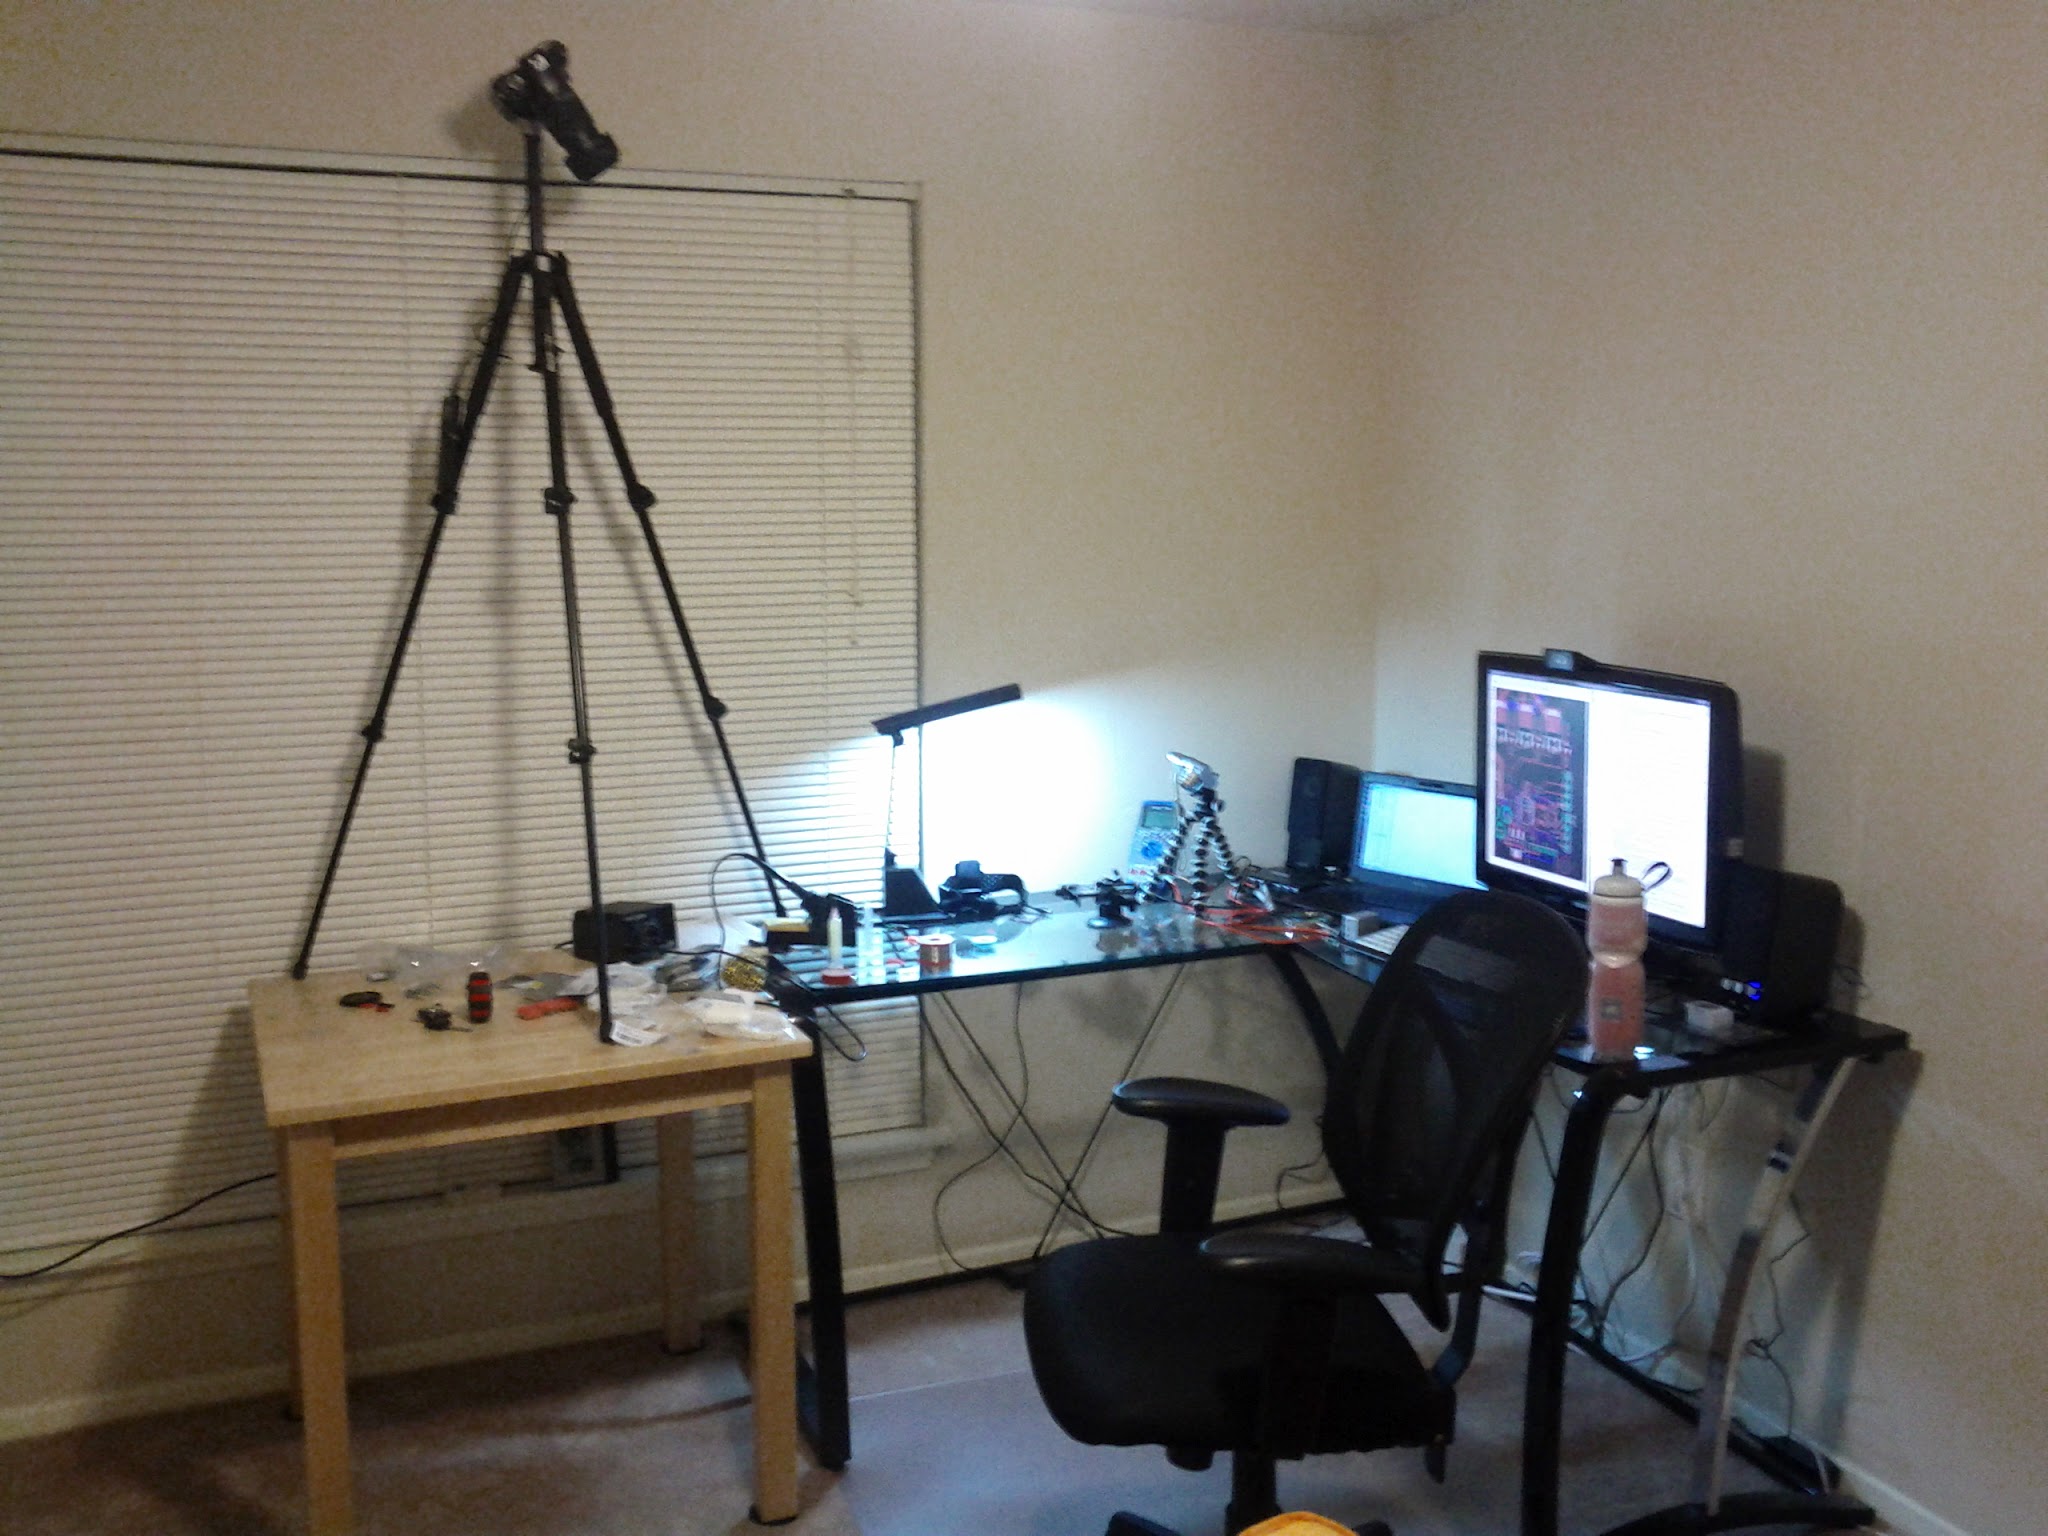
I finally managed to make a quick video of the build process for my wireless RGB LED controller. I used two cameras to do a time-lapse of the build. Unfortunately, they were using different frame-rates, so it took me a bit to get both of them synchronized. If you’re curious how the setup looked, here’s a (bad) picture of it:
I uploaded the EagleCAD files for the board(schematic and PCB) to github: https://github.com/alvarop/eagle/tree/master/wirelessrgbled
I’m not sure what the ‘official’ way of making this open hardware, so I just put the OSHW logo on the latest revision. Here is the video of the build (with a quick demo!):
I just spent several hours debugging my cc2500 radio libraries. What changed you might ask? Two lines of code…
My Wireless RGB LED driver had been using the msp430g2452 microcontroller. So far it has been working great! Someone emailed me asking about the msp430g2533, and how it wasn’t quite working. I currently use the msp430g2203 (which is a cheaper variant of the 2533) as my PC-to-cc2500 interface, and it has been working for a while (or so I thought!).
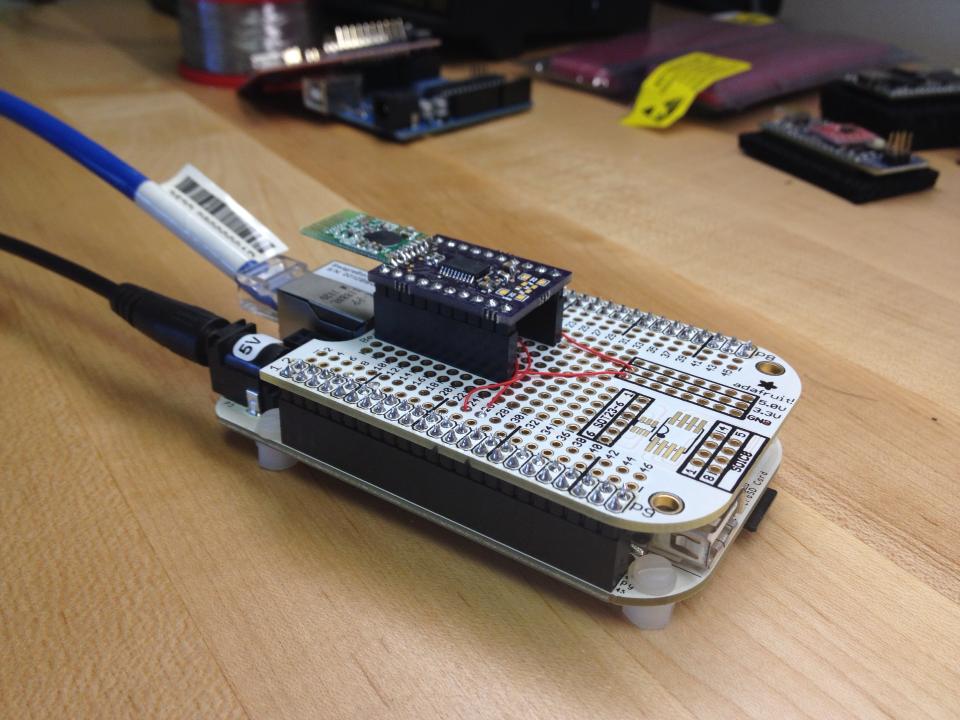
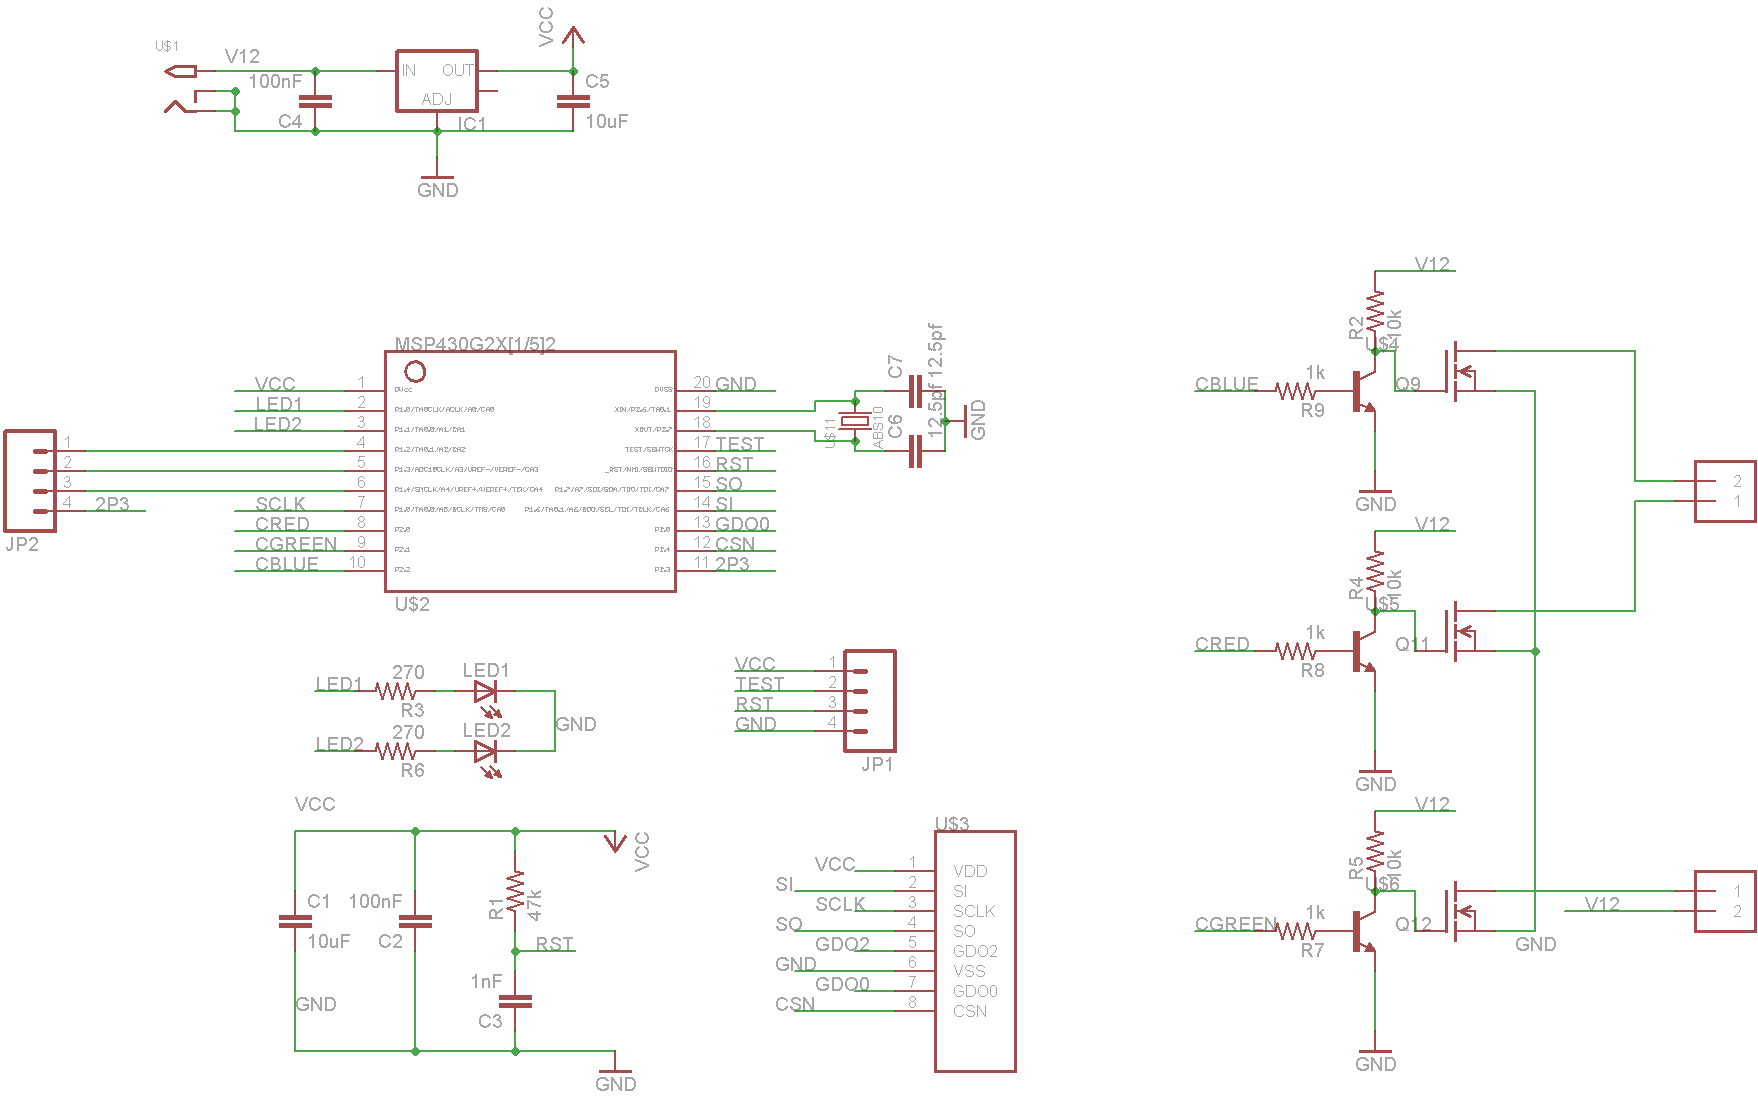
I’ve been working on my wireless RGB LED boards for a while now. I finally made an all-in-one PCB that includes an msp430, a cc2500 radio module, 3 MOSFETs for driving the LED strips and a 3.3v linear regulator. I know it’s not the most efficient setup, but right now I want to focus on software and need hardware that just works.
The design is really simple. 12V in are passed through directly to the RGB LED light strip. A 3.3v linear regulator(that gets a bit warm while wasting power) takes care of the msp430 and cc2500. There are two LED’s for rx/tx notification (or anything else I might need). Since the MOSFETS can’t be directly powered by the msp430 (they need to be at +12V to turn on), I added some transistors to drive them.