PIR Sensor Comparison
I recently started working on a project that might require some Passive Infra-red (PIR) sensors. Sparkfun had two different ones, so I figured I’d try them both.
The comparison is between a Zilog ePIR and an SE-10. One very important thing to note is that I did not use the ePIR’s serial interface. I only used the hardware interface, set to the highest sensitivity, and shortest delay. I felt that this would be a better comparison. I made a video that shows my test setup, as well as some results, so most of the relevant information is there. I’ll use this blog post to add some setup details, as well as my conclusion.
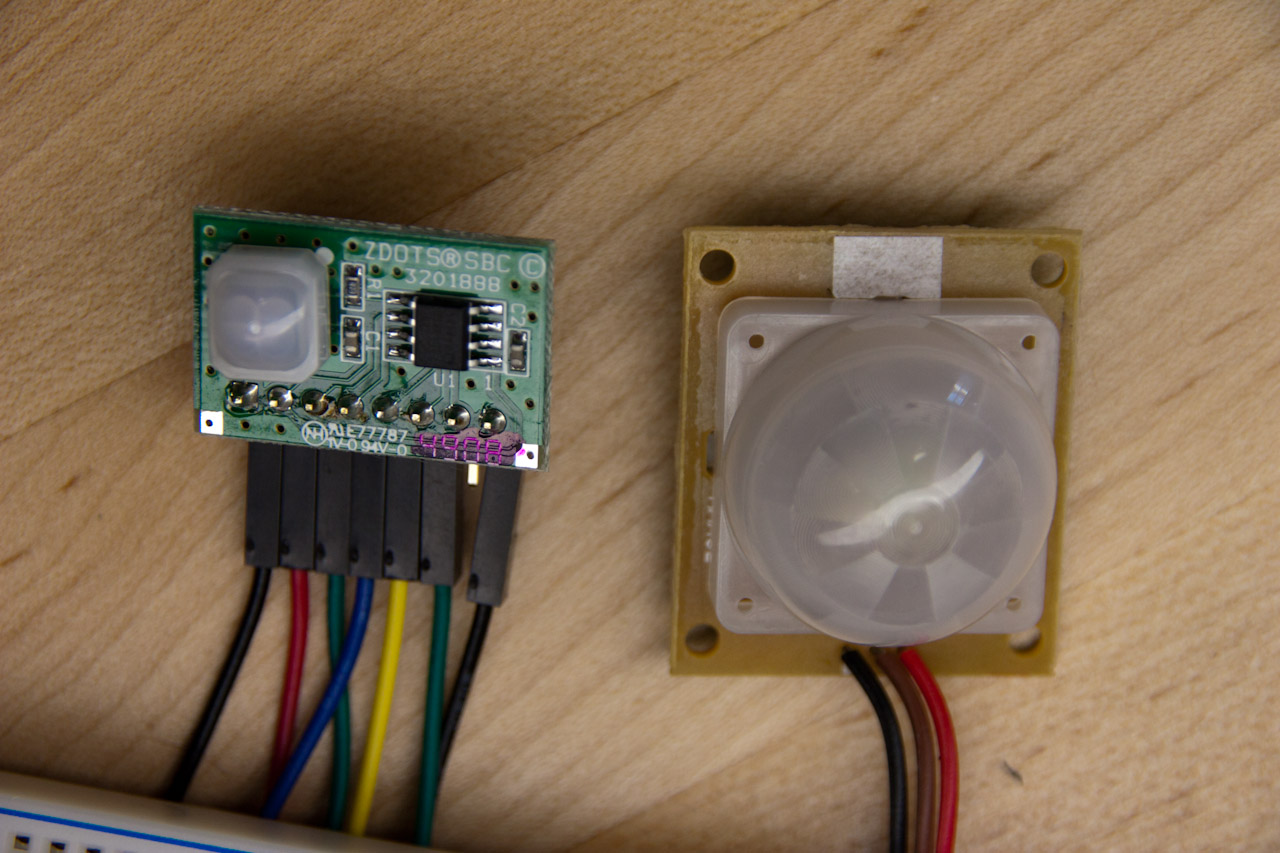
First of all, I must warn everyone (as Sparkfun did) about the SE-10. The wire colors mean absolutely NOTHING. As you can see in the photo, there is a black, brown, and red cables. Here’s what they were connected to on mine: Black=12V, Brown=GND, Red=Alarm. It’s not a huge problem, just make sure you know before supplying power. There’s a small label that says B+ and AL on the bottom near each wire that should help.
The alarm pin needs to have a pull-up resistor, but that’s about it. Out of the box, it worked without a problem.
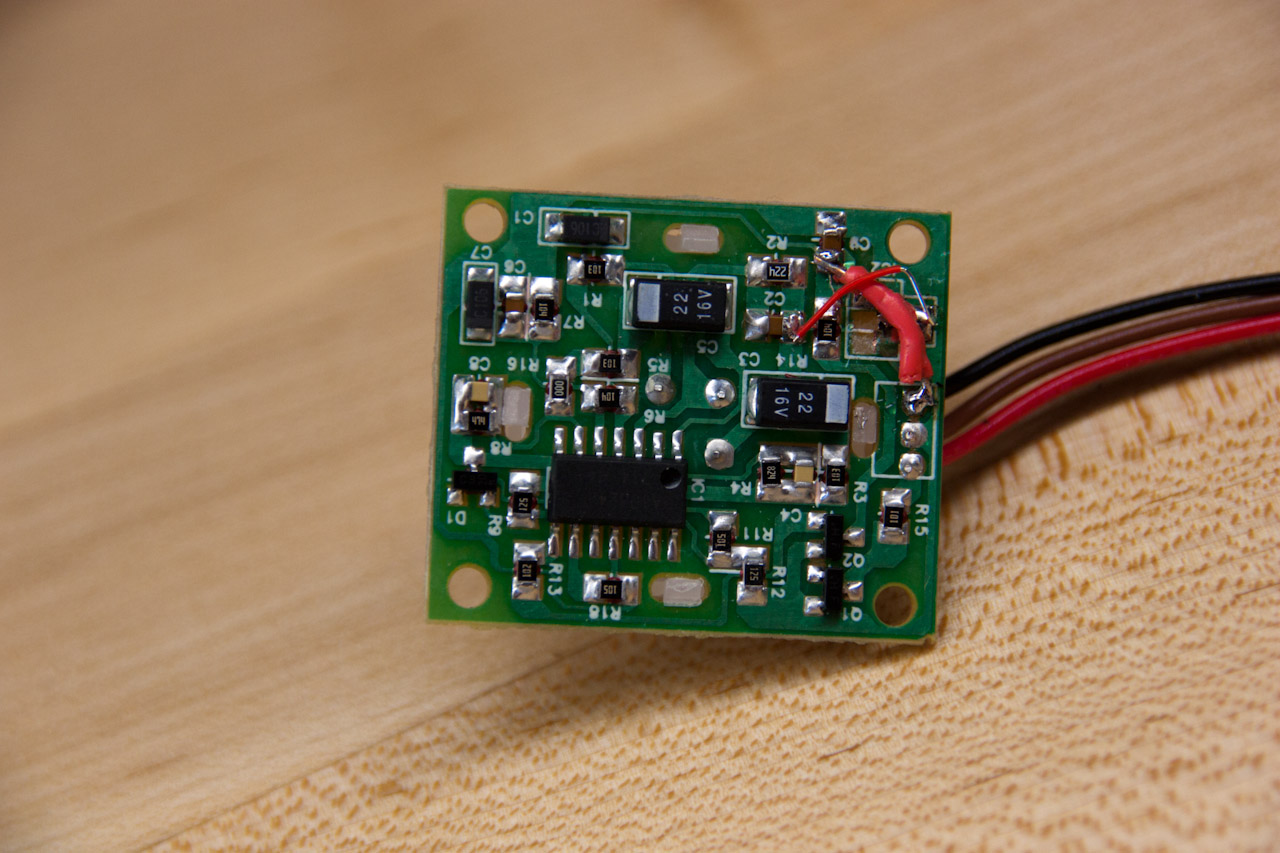
You’ll notice the SE-10 takes in 12V. Several comments on the Sparkfun product page deal with powering the device with 5V or 3.3V. All I did was remove the 5V regulator and jump across it with a wire (big red one on the photo). Unfortunately, I ripped off some traces while attempting to remove the regulator (oops!). At first it wouldn’t work, but I noticed a very small trace going under one of the resistors and connecting to the ground pin of the regulator. After connecting that to ground again (small red wire on the photo), everything worked fine at 5V.
The ePIR sensor took me a bit longer to get working. The datasheet is quite long, mostly documenting all the configurations and serial interface. They do have a nice schematic showing the Hardware Interface Mode. It shows all the connections required to get this working without the serial interface. The schematic has three potentiometers, a photoresistor and three regular resistors. Luckily, you don’t even need that for the most basic operation. The pots are all for setting the delay(pin 2), sensitivity(pin 3), and light gate threshold(pin 6). You can just connect the delay and sensitivity pins to ground, and the light gate to VCC(which is 3.3V for this device). This will use the minimum delay (2 seconds), maximum sensitivity, and have the device always on.
The light gate is there in case you want to enable/disable your sensor depending on ambient light with a photoresistor. You can also just use the pin as an enable/disable for the whole device. It is disabled while the input is less than 1V.
The delay had me a bit confused initially. It is not a delay before it lets you know something is moving. On the other hand, once it detects something, it holds a ‘detected’ state for the delay period. I had the minimum delay setting of 2 seconds (it goes up to 15 minutes), so after detecting motion, the signal would stay low for that amount of time.
So which sensor should you use? As always, it depends… I found the ePIR sensor to be much more sensitive than the SE-10. Maybe it was just the one I received, or maybe they’re all like that, but the ePIR could detect me at a wider angle (and behind the blanket!). It also seemed faster than the SE-10 at longer distances. On the other hand, when I stood a few feet in front of the sensors and turned around, the response was about the same.
Another thing I mentioned in the video is the ‘delay’ time with the ePIR. The output signal is much cleaner because of it. The SE-10, on the other hand, constantly switches while something is moving. I guess that could be useful if you’re trying to count something…
If you’re looking for a very easy to setup sensor, and aren’t too worried about sensitivity, I’d go with the SE-10. It’s three wires and a pull-up resistor! Doesn’t get much simpler than that. On the other hand, if you want more control, and are willing to spend more time tweaking stuff, the ePIR is probably a better idea.