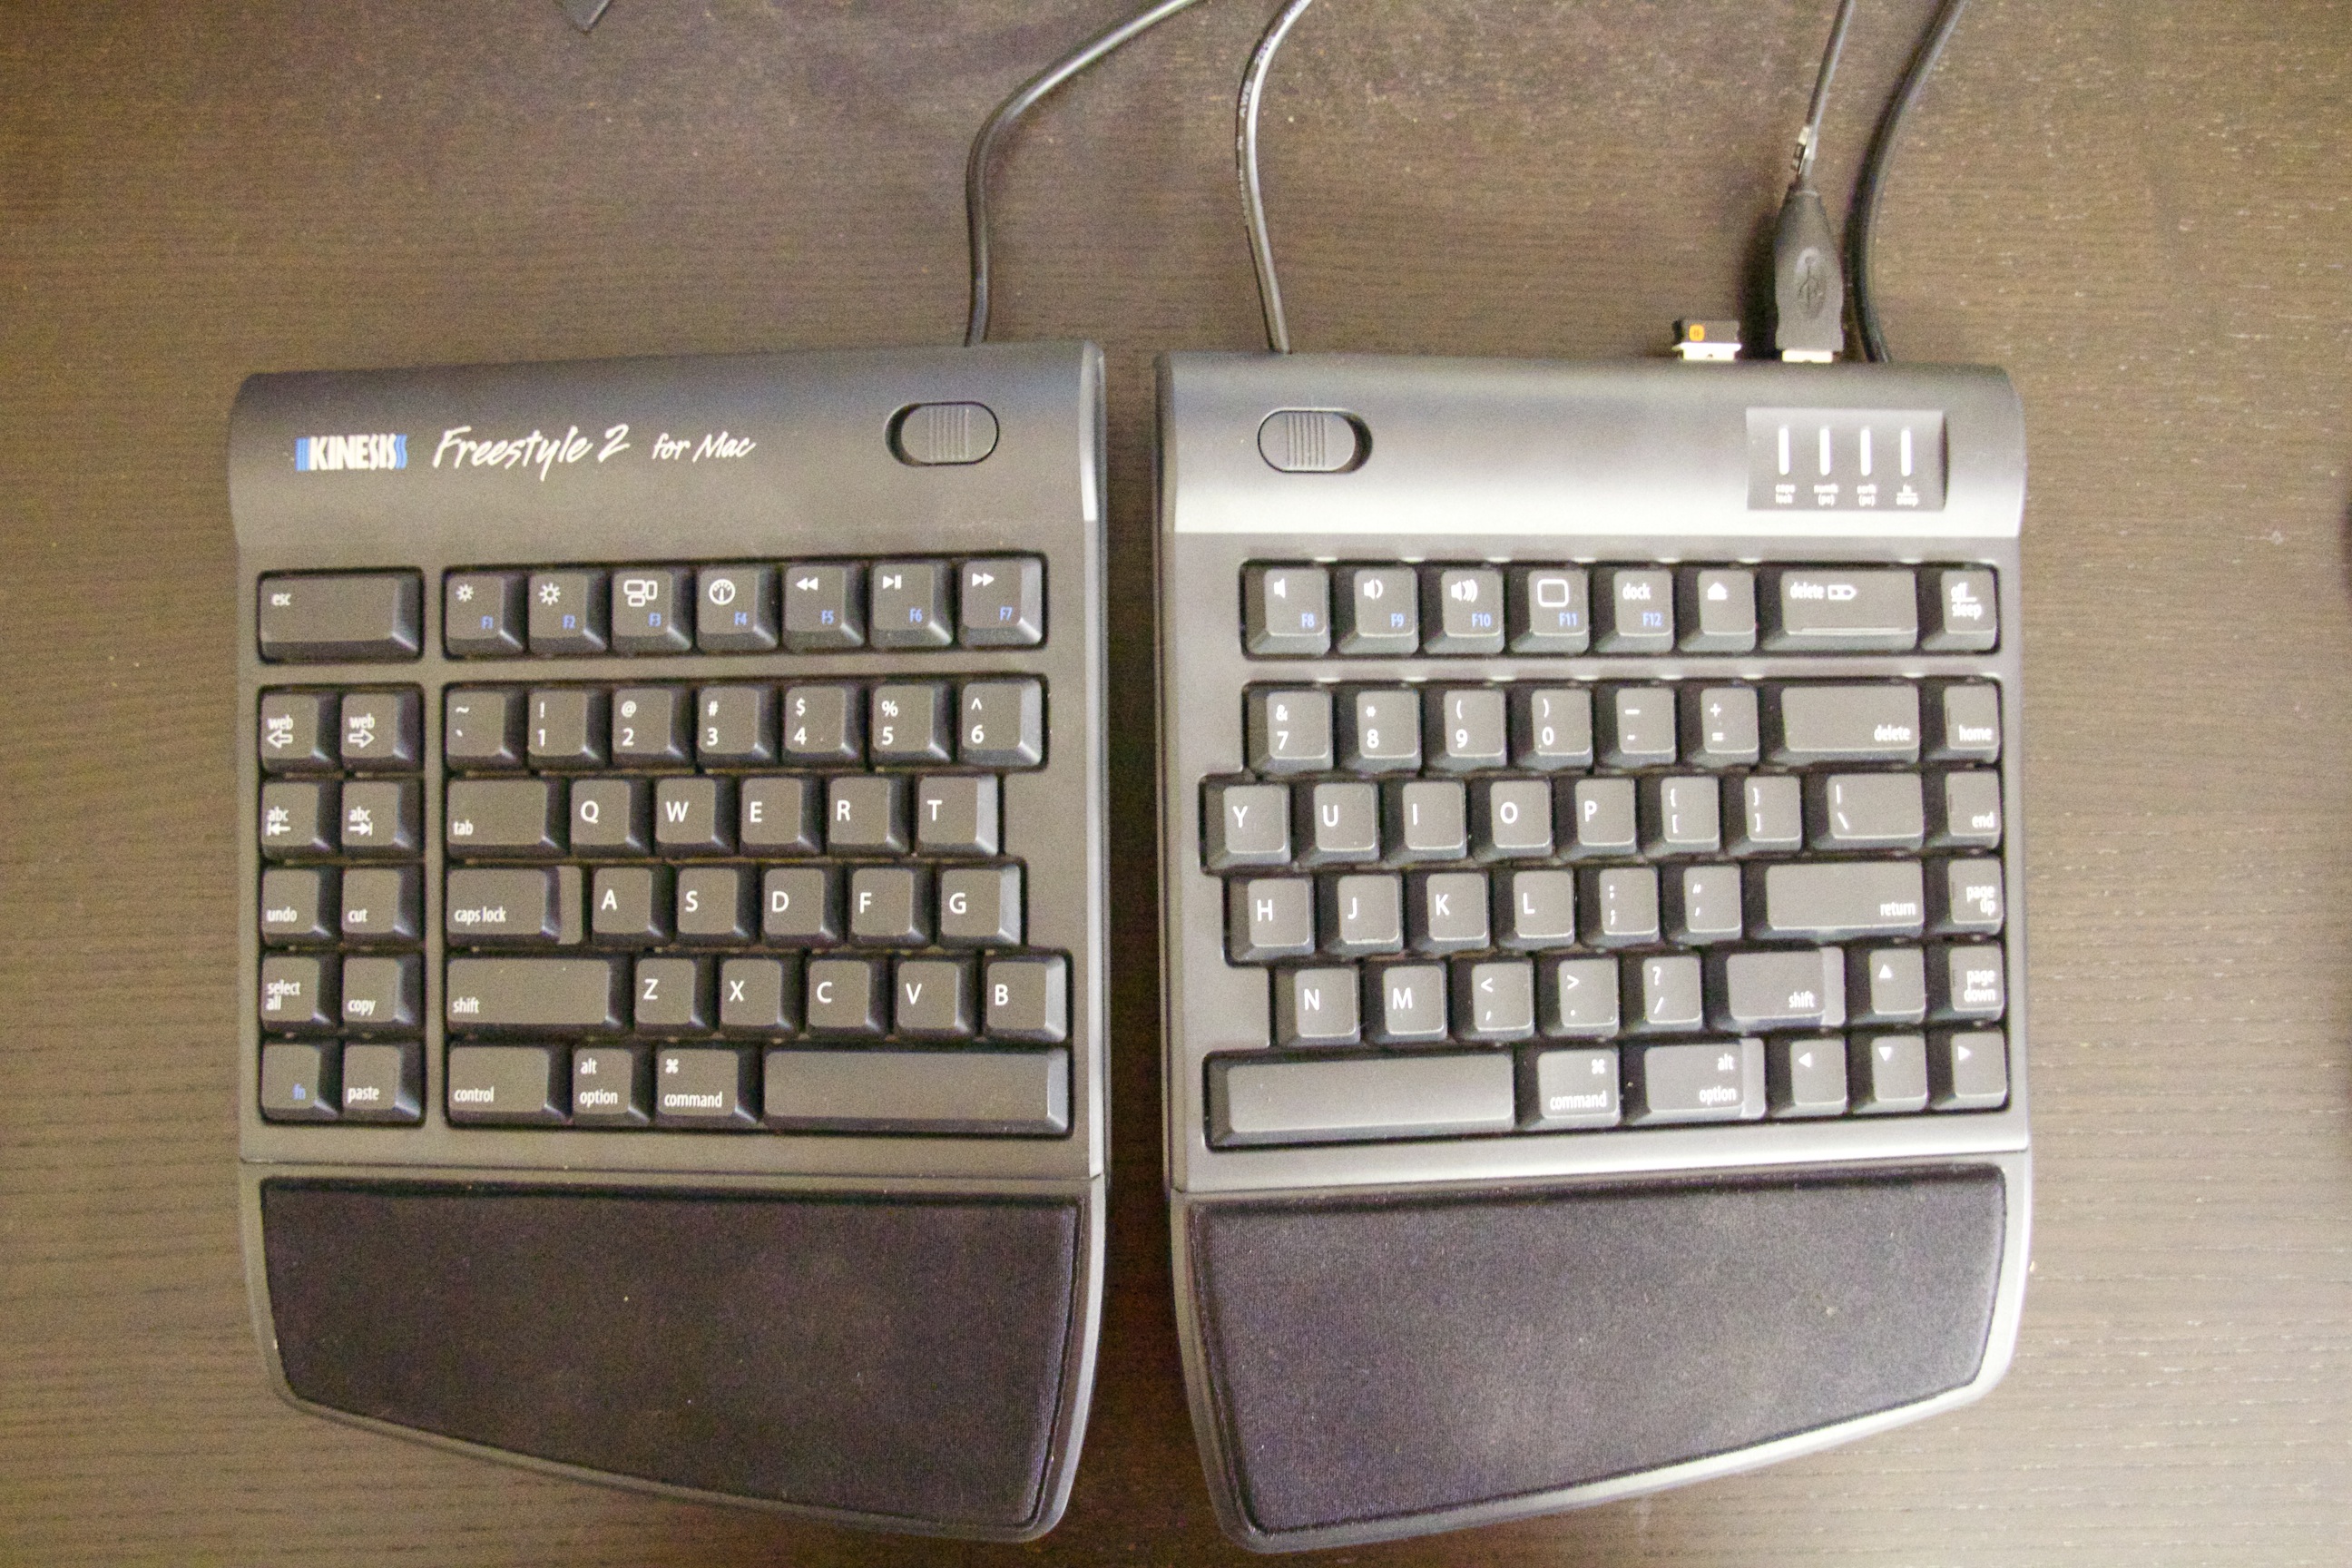
Kinesis Freestyle 2 Keyboard 'Mod' (to Fix Media Keys)
Soon after I bought my Kinesis Freestyle 2 Keyboard, I noticed that the media keys (next/previous song) did not work with Spotify on OSX. The strange part is that they work just fine on iTunes. I decided to email the Kinesis tech support to see if they had a solution.
Kinesis support was extremely quick to respond and informed me that this was a known problem and was fixed in the latest batch of keyboards. They offered to update the firmware on mine for free, but that required me sending them my keyboard (which is awesome!). I didn’t want to do that, so I figured, If they can update the firmware on this thing, so can I!
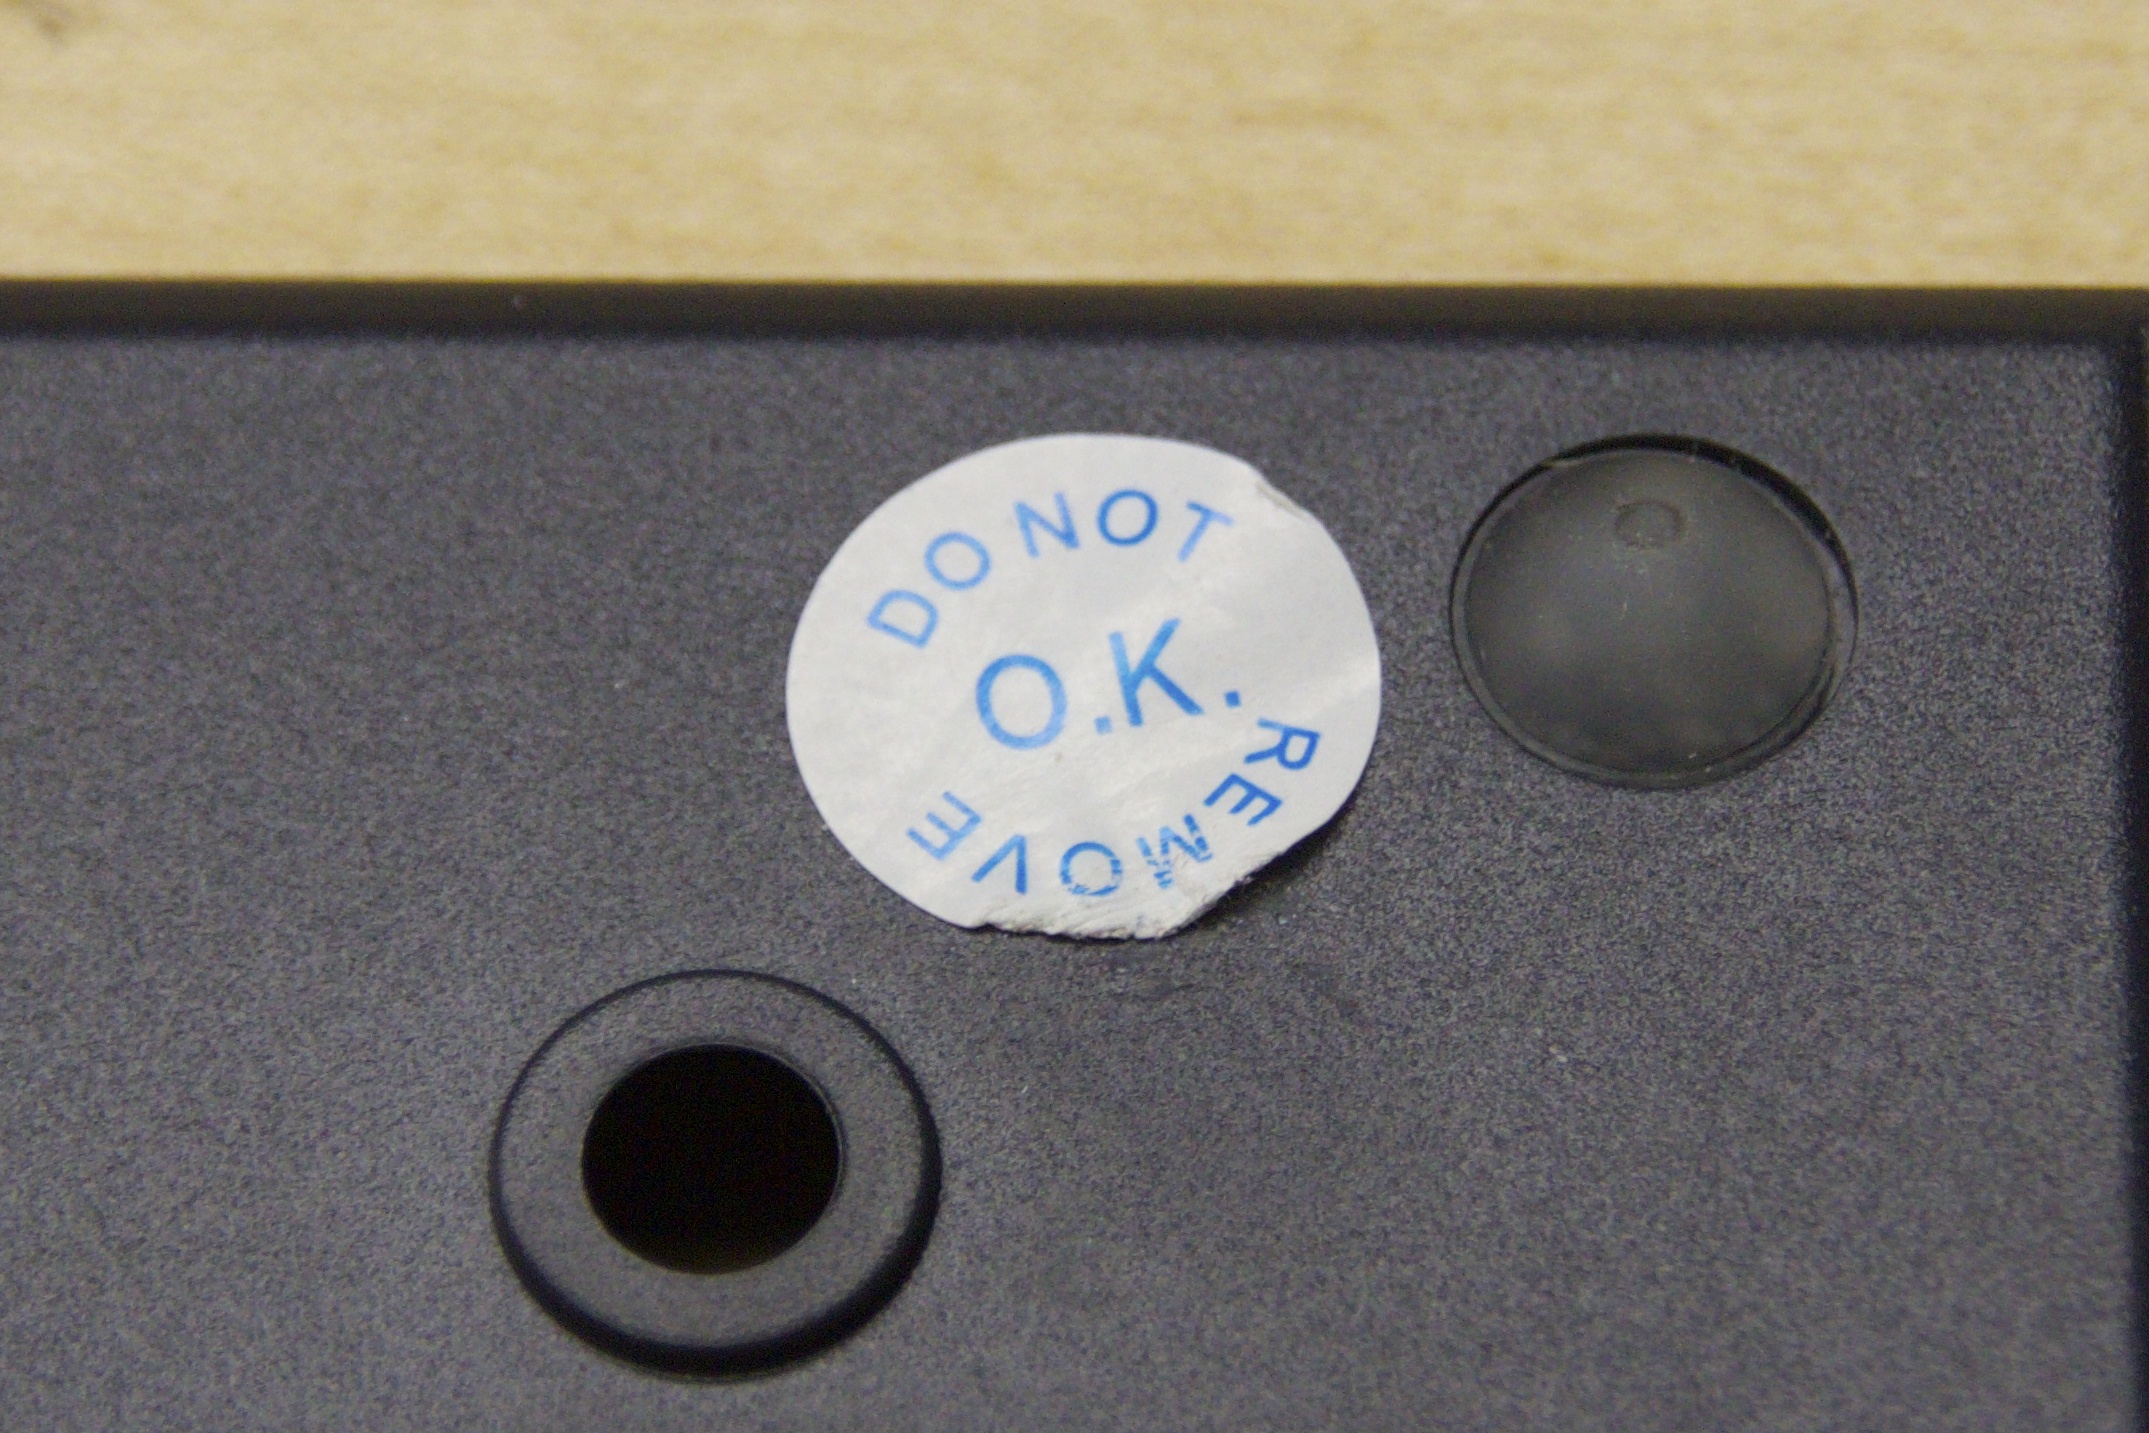
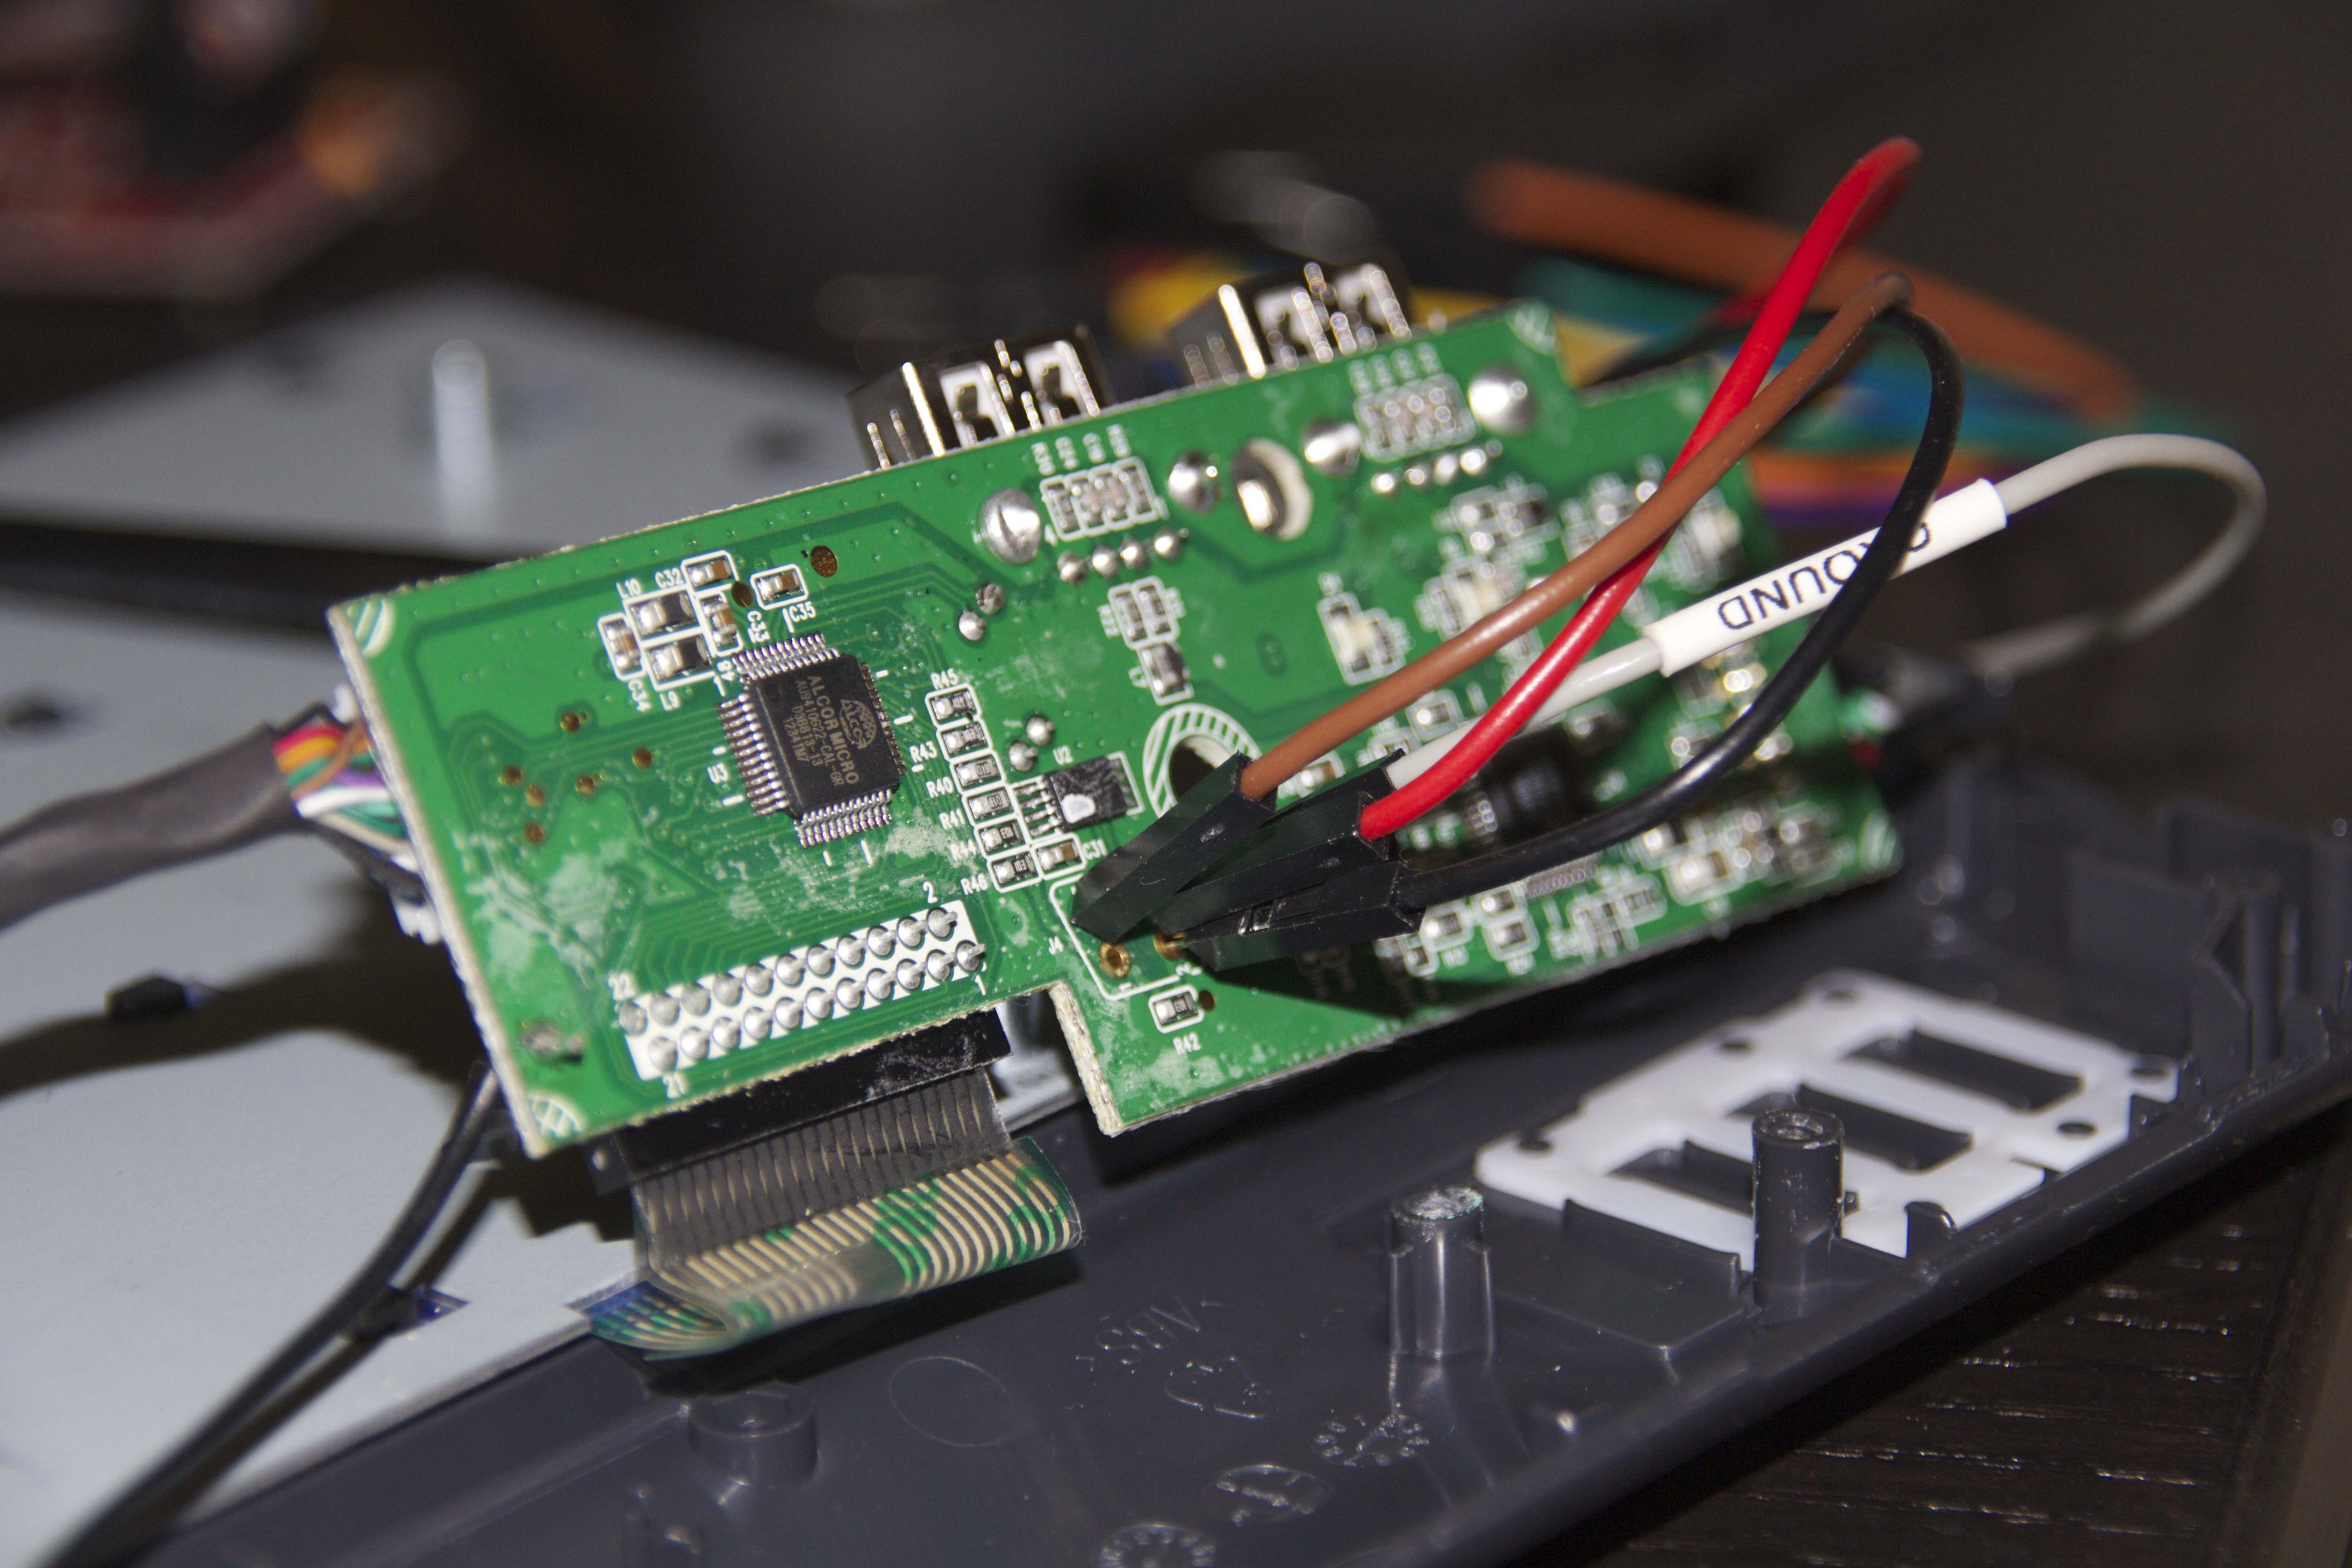
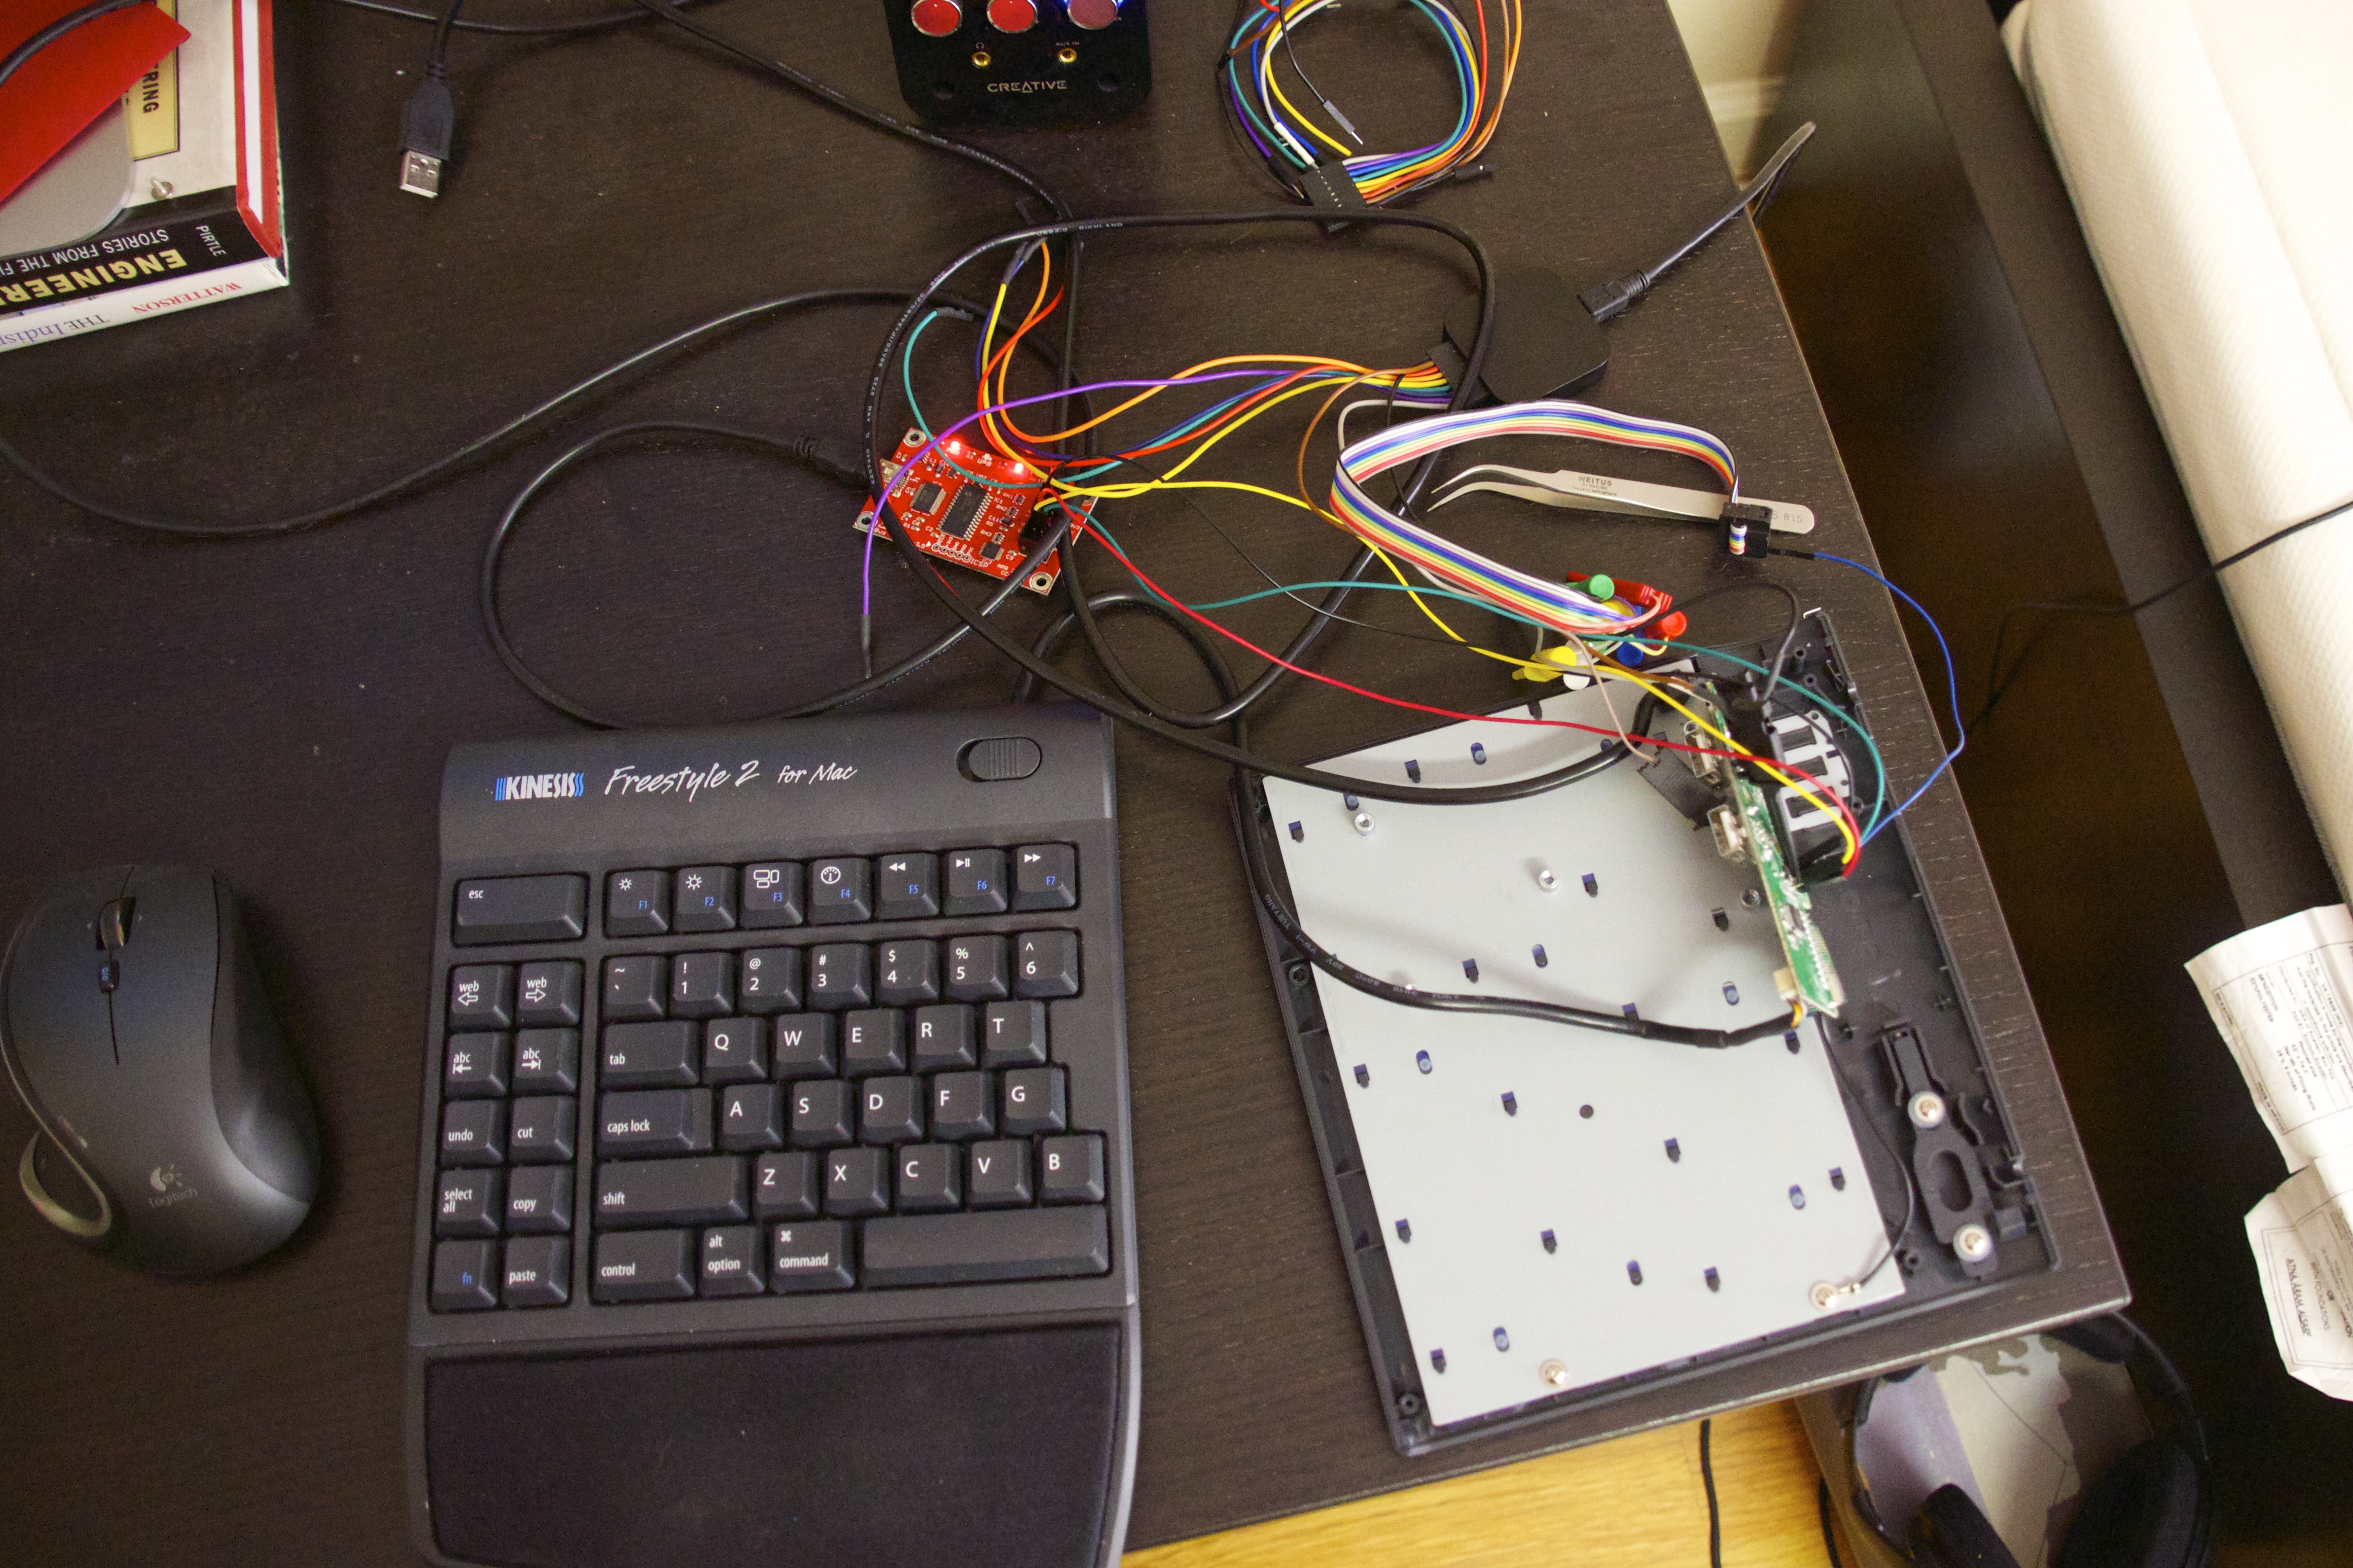
I had no knowledge of usb keyboards before I started, so the first thing I did was take the thing apart. (Well, one side of it, where all the controls are.) As usual, there was one extra hidden screw under a “Do Not Remove” tag.
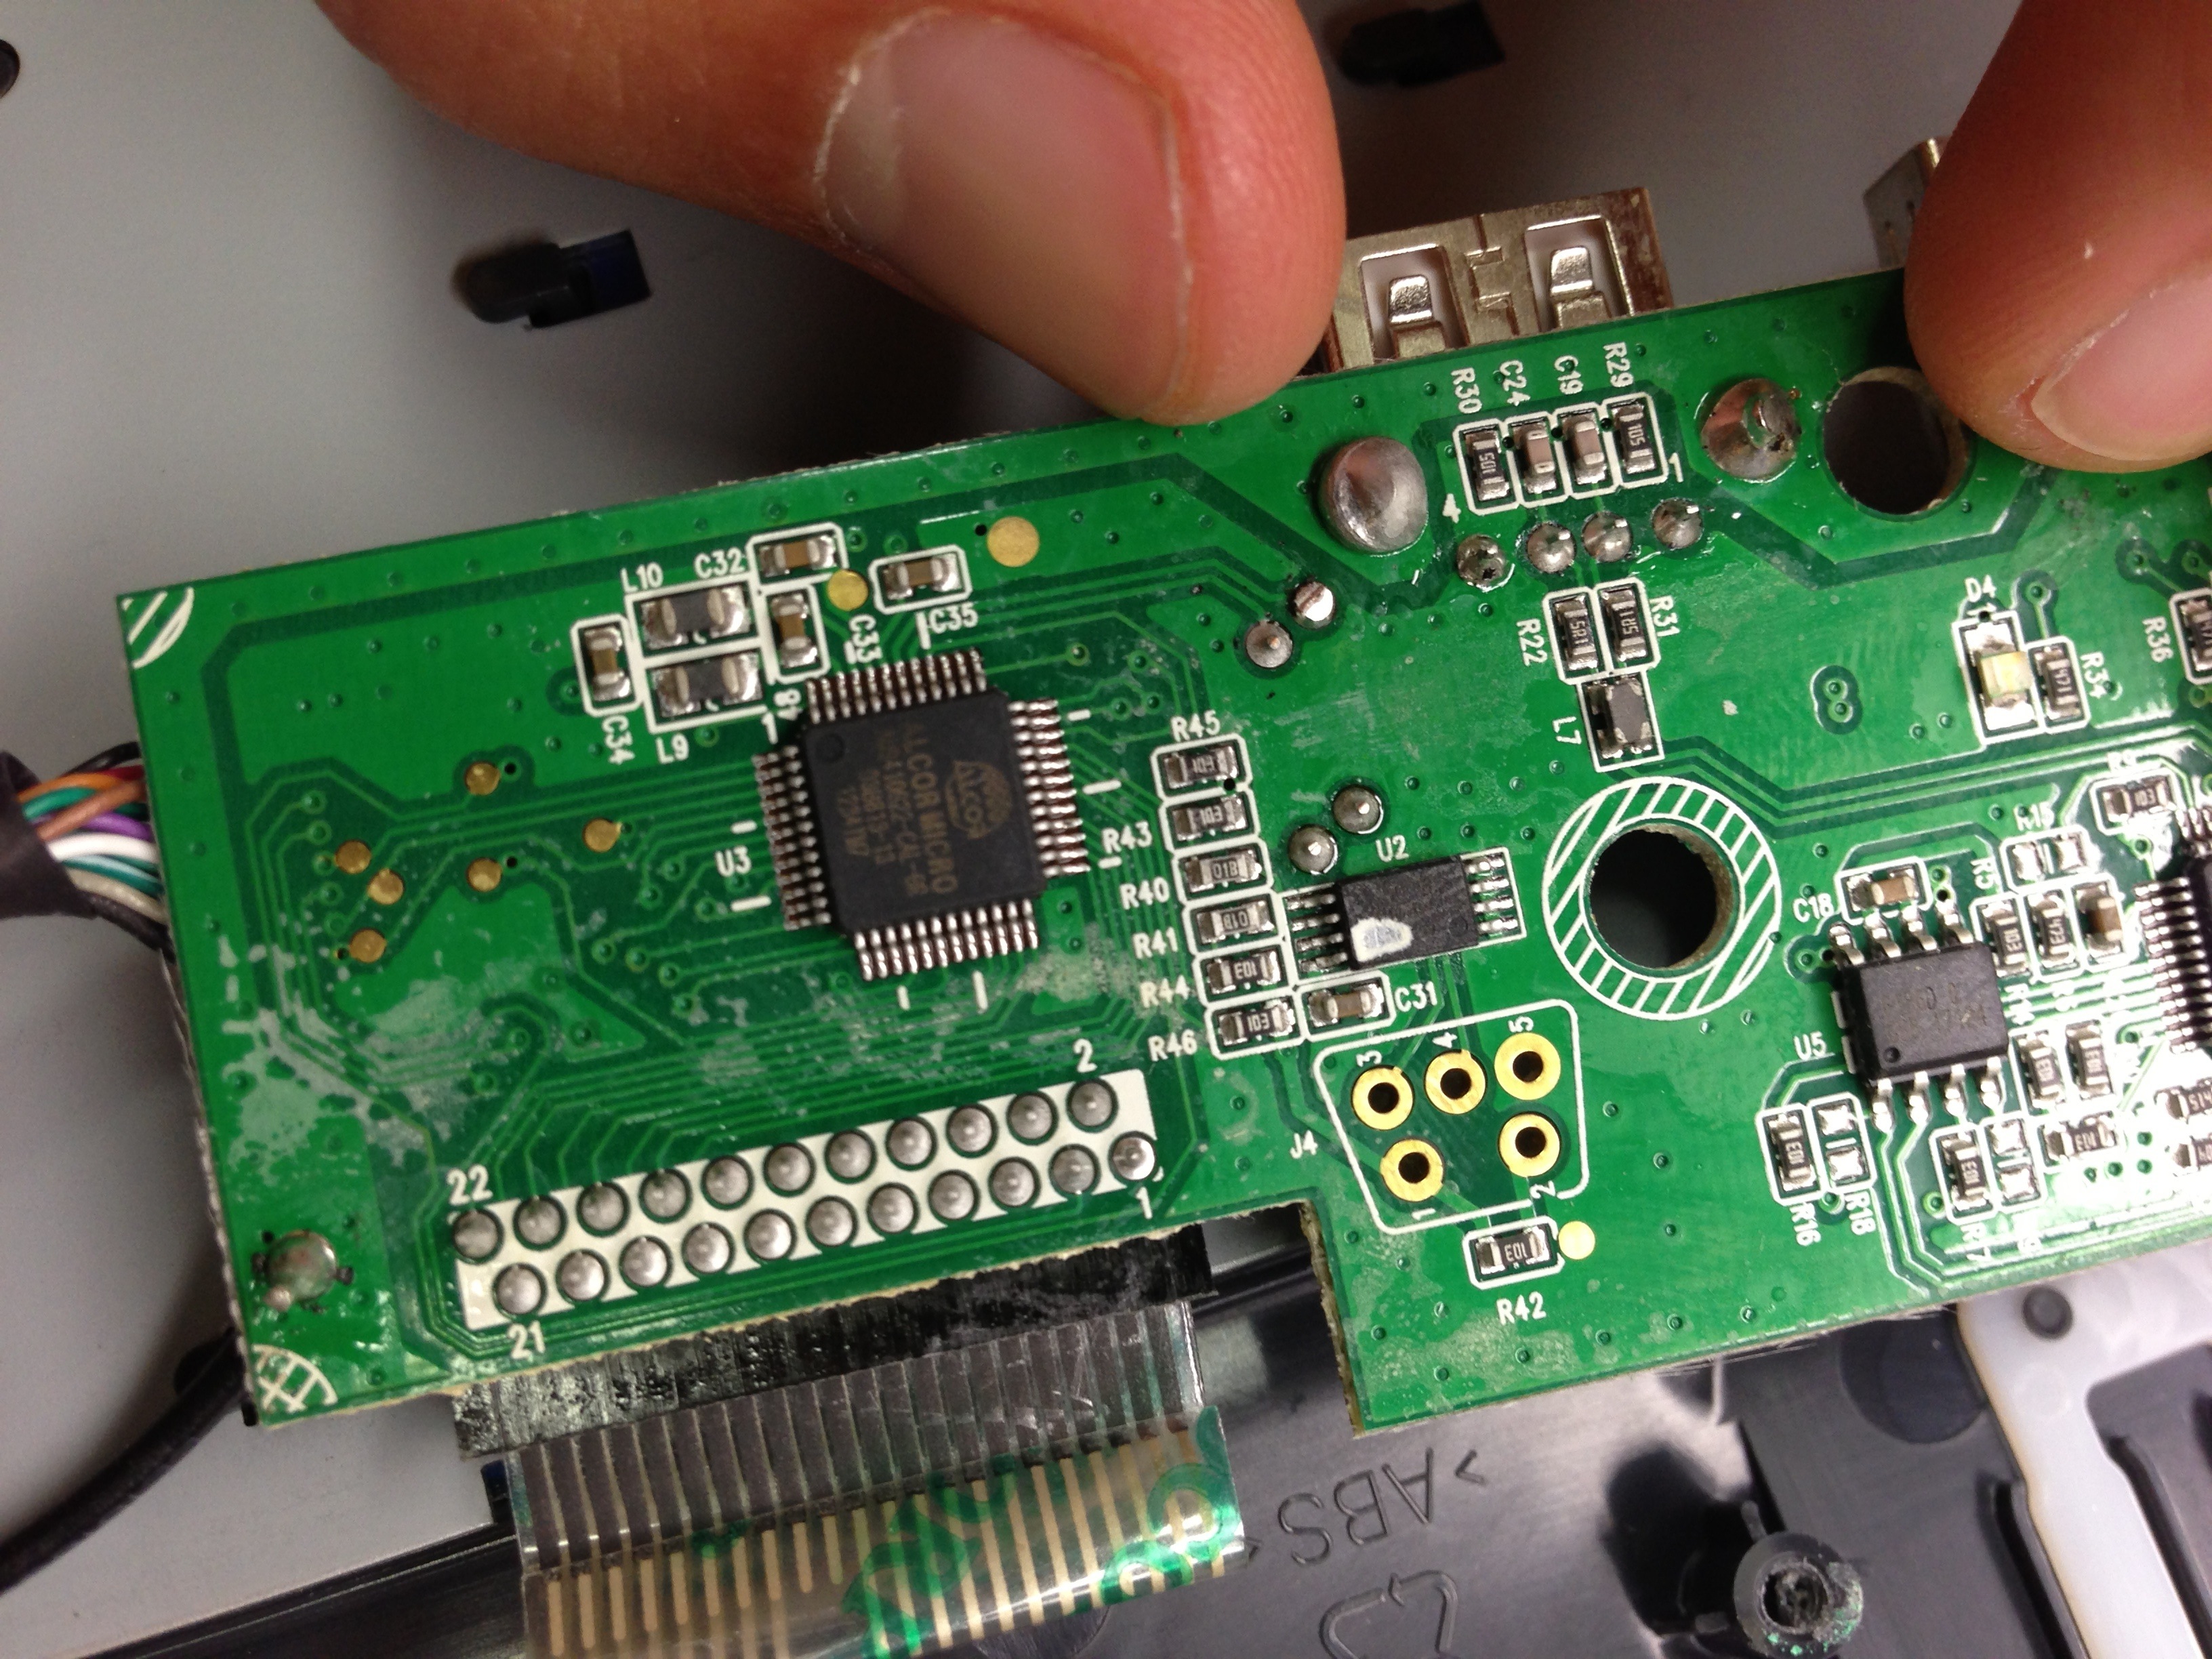
The keyboard itself has a few IC’s. The larger one is a Genesys Logic GL850G, which is a USB Hub. this makes sense, since there are two extra USB ports on the keyboard. The second one is an Alcor Micro AU9410 USB Keyboard Controller. Great, now I know what to look for!
After finding the data sheet for the controller, I started reading. The Alcor Micro guys were nice enough to include an example schematic, which included the pinout for the part. After reading some more, I realized there is an optional external EEPROM that can be used to change the controller’s configuration. This seemed like the perfect place to start probing.
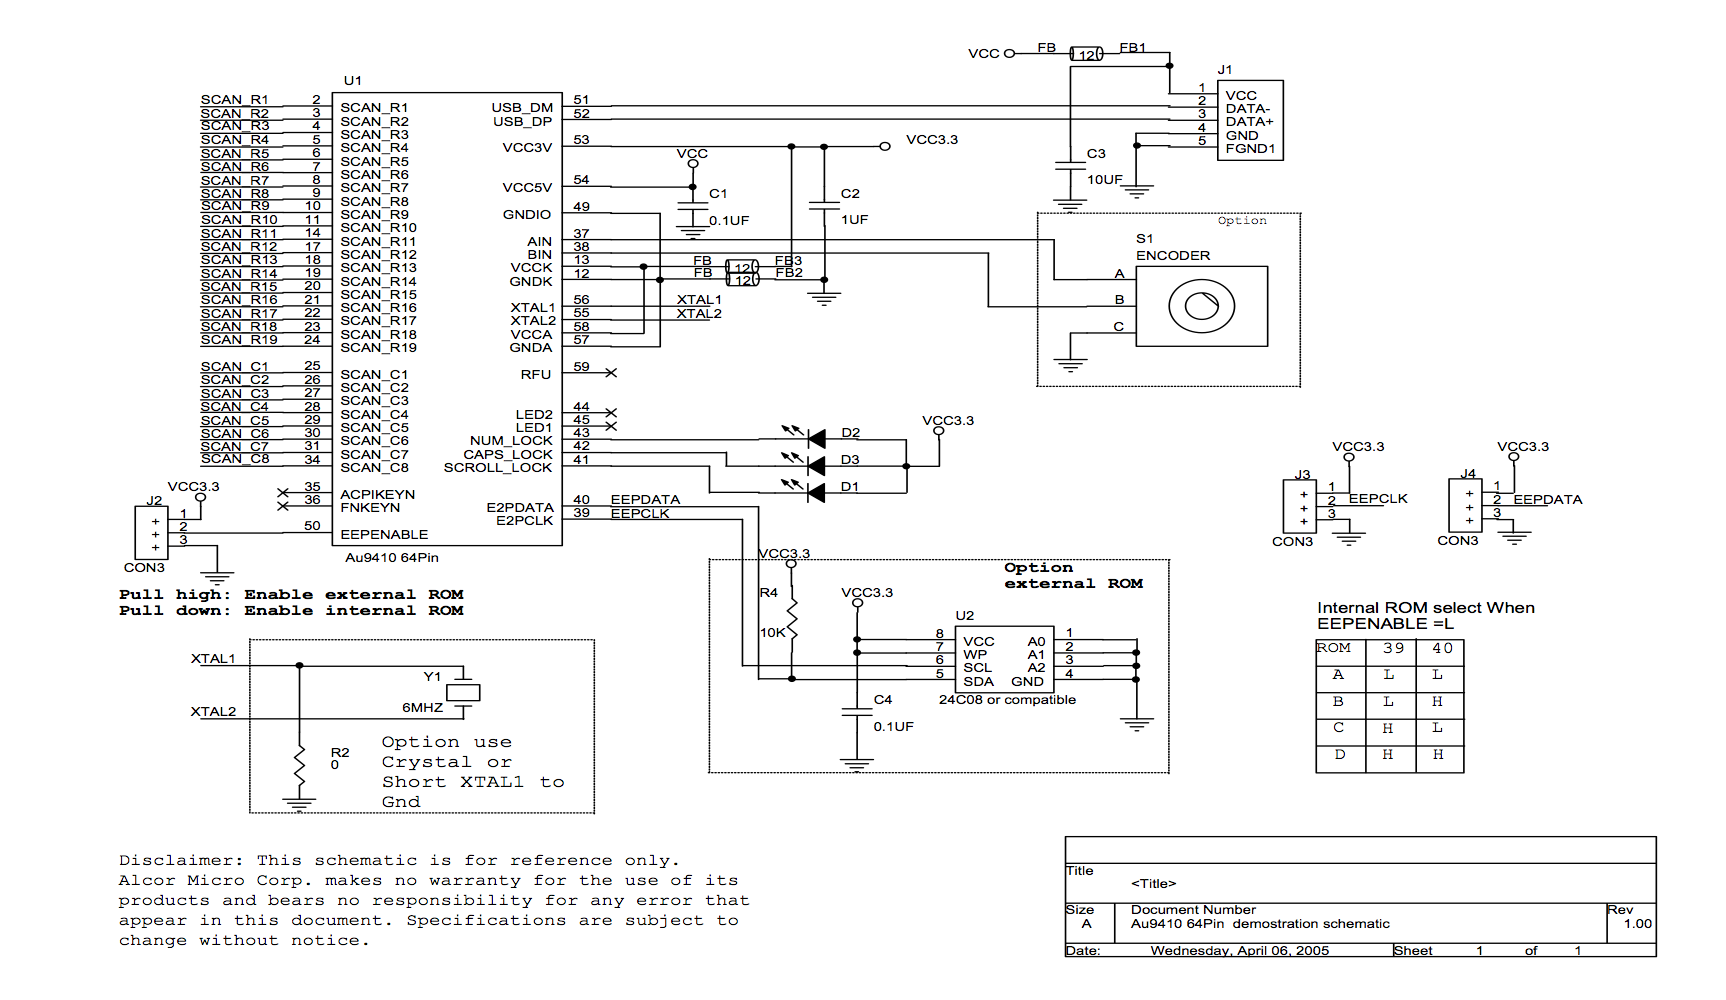
Unfortunately, the EEPROM is not labeled. On the other hand, the controller schematic states that it must be ‘a 24C08 or compatible’ part. Microchip makes one, so I found that data sheet. Time to start probing!
The keyboard designers left a nice 5 pin header unpopulated on the board. After some looking around, here’s the pinout I came up with:
1 - VCC 2 - EEPROM Write Protect 3 - I2C SCL 4 - I2C SDA 5 - GND
I used my Saleae Logic to take a look at what the keyboard does when it’s connected. The first it does after starting is read a whole lot of data from the EEPROM. After looking at the addresses, I noticed it was all the USB descriptor information. Including the device name, manufacturer, etc…
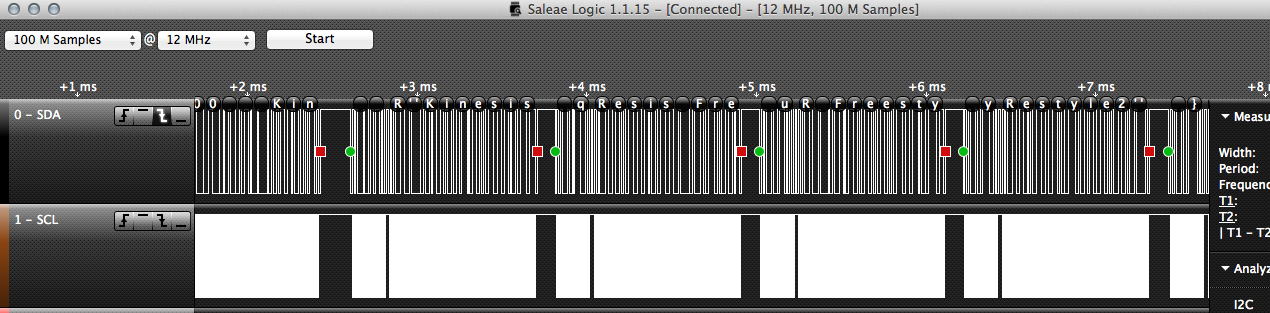
The next thing I tried was pressing on a key to see what happened. Turns out that whenever a key is pressed, the controller reads from the EEPROM every ~9ms or so. The address it reads from corresponds to the row and column on the keyboard. The value it reads is a four byte number. For example, when I press the letter ‘A’, it reads 00 00 04 04. The letter ‘G’ results in 00 00 0A 0A. The ’next song’ and ‘previous song’ keys had slightly different codes 03 B5 00 40 and 03 B6 00 3E respectively.

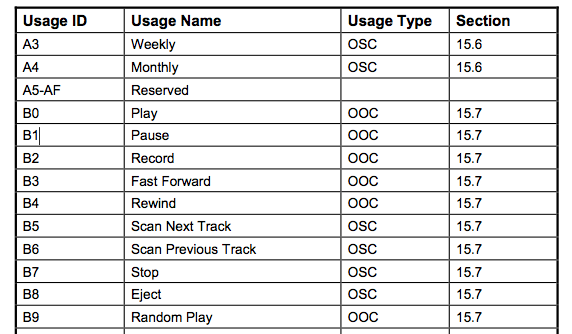
I wasn’t sure exactly what these numbers meant, so I started googling around. I ended up looking at the USB HID Usage Tables. In chapter 10, they have the Keyboard/Keypade codes. The letter ‘A’ is mapped to 0x04 and ‘G’ is mapped to 0x0A. Great, now I know what the numbers mean! Or not. Turns out the keyboard codes only go up to 0xE7. The rest (up to 0xFFFF) are reserved…
After some struggling, I ended up on the same document, this time in chapter 15 (Consumer Page). Looks like the ‘Usage ID’ 0xB5 is set for “Scan Next Track”. Perfect! I still don’t know what the rest of the bytes mean, but the 0xB5 means scan next track…
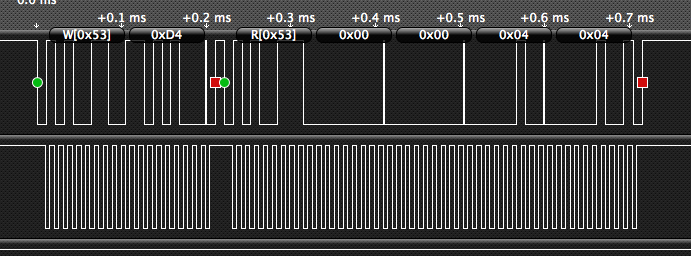
Now that I know what I need to change, I have to figure out how to do it. I took out my BusPirate and connected it to the I2C bus. Once it’s in I2C mode, you can dump the entire EEPROM using “[0xa0 0x00][0xa1 r:1025]”. I had to read an extra byte because the last one kept getting NACKed. Always make sure to backup your EEPROM data before modifying! For the curious, here are my EEPROMs contents:
{% highlight bash%} 48 31 B1 C3 1C 35 C3 CC CC DE 35 70 47 50 70 B1 60 69 DE 13 4D 51 51 65 65 88 88 A0 09 02 19 00 01 01 00 A0 19 09 04 00 00 01 09 00 00 00 07 05 81 03 01 00 FF 09 02 3B 00 02 01 00 A0 19 09 04 00 00 01 03 01 01 00 09 21 10 01 00 01 22 41 00 07 05 81 03 08 00 0A 09 04 01 00 01 03 00 00 00 09 21 10 01 00 01 22 35 00 07 05 82 03 04 00 FF 05 01 09 06 A1 01 05 07 19 E0 29 E7 15 00 25 01 75 01 95 08 81 02 95 01 75 08 81 01 95 05 75 01 05 08 19 01 29 05 91 02 95 01 75 03 91 01 95 06 75 08 15 00 26 FF 00 05 07 19 00 2A FF 00 81 00 C0 00 00 10 01 09 00 00 08 8F 05 10 94 00 01 01 02 00 01 09 29 03 00 00 16 32 00 FF 12 01 10 01 00 00 00 08 8F 05 10 94 22 01 01 02 00 01 05 01 09 80 A1 01 85 02 75 01 95 01 15 00 25 01 09 81 81 06 09 82 81 06 09 83 81 06 75 05 81 01 C0 05 0C 09 01 A1 01 85 03 95 01 75 10 19 00 2A 3C 02 81 00 C0 00 00 00 00 00 00 00 00 00 00 00 00 00 00 00 00 00 00 00 00 00 00 00 00 00 00 00 00 00 00 00 00 00 00 00 00 00 00 00 00 00 00 00 00 00 00 00 00 00 00 00 00 00 00 00 00 00 00 04 03 09 04 28 4B 49 4E 45 53 49 53 20 43 4F 52 50 4F 52 41 54 49 4F 4E 46 4B 42 38 30 30 48 4D 20 4B 69 6E 65 73 69 73 20 46 72 65 65 73 74 79 6C 65 32 20 66 6F 72 20 4D 61 63 30 55 53 42 20 4D 75 6C 74 69 6D 65 64 69 61 20 4B 65 79 62 6F 61 72 64 00 00 00 00 00 00 00 00 00 00 00 00 00 00 00 00 00 00 00 00 00 00 00 00 00 00 00 00 00 00 00 00 00 00 00 00 00 00 00 00 00 00 00 00 00 00 00 00 00 00 E7 E7 00 00 E7 E7 00 00 00 00 00 00 00 00 43 B8 00 00 00 00 00 E5 00 08 50 E1 00 08 4F E5 00 08 2F E1 00 08 30 E5 00 00 E2 E2 00 00 22 22 00 00 3A 3A 00 00 1C 1C 00 08 06 E1 00 08 04 E5 00 08 1D E5 00 00 E1 E1 00 00 E5 E5 00 00 21 21 00 00 4D 4D 00 00 4A 4A 00 00 50 50 00 00 00 00 00 00 52 52 00 00 58 58 00 00 67 67 00 00 57 57 00 00 4E 4E 00 00 4B 4B 00 00 56 00 00 00 55 00 00 00 63 00 00 00 5B 00 00 00 5E 00 00 00 61 00 00 00 00 00 02 81 00 E5 00 00 4F 4F 00 00 54 00 00 00 62 00 00 00 5A 00 00 00 5D 00 00 00 00 E5 03 B8 00 E1 00 00 4C 4C 00 00 51 51 00 00 53 00 00 00 2C 2C 00 00 59 00 00 00 5C 00 00 00 00 E4 03 E9 00 43 03 EA 00 42 00 0C 07 45 00 00 28 28 00 01 51 44 00 00 31 31 00 00 2A 2A 00 00 00 E6 00 00 00 00 00 00 19 19 00 00 E7 E7 00 00 0A 0A 00 00 E3 E3 00 00 00 E4 00 08 1B E1 00 00 23 23 00 00 27 27 00 00 2D 2D 00 00 38 38 00 00 32 32 00 00 34 34 00 00 33 33 00 00 2F 2F 00 00 13 13 00 00 26 26 03 E2 00 41 00 00 00 00 00 00 37 37 00 00 00 00 00 00 0F 0F 00 00 00 00 00 00 12 12 00 00 25 25 00 00 2E 2E 00 00 87 87 00 00 36 36 00 00 00 00 00 00 0E 0E 00 00 30 30 00 00 0C 0C 00 00 24 24 00 00 00 00 00 00 11 11 00 00 10 10 00 00 0B 0B 00 00 0D 0D 00 00 1C 1C 00 00 18 18 00 00 21 21 00 00 22 22 00 00 05 05 00 00 19 19 00 00 0A 0A 00 00 09 09 00 00 17 17 00 00 15 15 00 00 20 20 00 00 6A 3B 00 00 2C 2C 00 00 06 06 00 00 45 3D 00 00 07 07 00 01 52 3C 00 00 08 08 00 00 1F 1F 00 00 69 3A 03 B3 00 40 00 00 1B 1B 00 00 64 64 00 00 16 16 00 00 39 39 00 00 1A 1A 00 00 1E 1E 00 00 35 35 03 CD 00 3F 00 00 1D 1D 00 00 29 29 00 00 04 04 00 00 2B 2B 00 00 14 14 03 B4 00 3E 00 00 E0 E0 00 08 19 E1 00 00 E6 E6 00 00 00 00 00 00 4C 4C 00 00 23 23 00 00 23 23 {% endhighlight %}
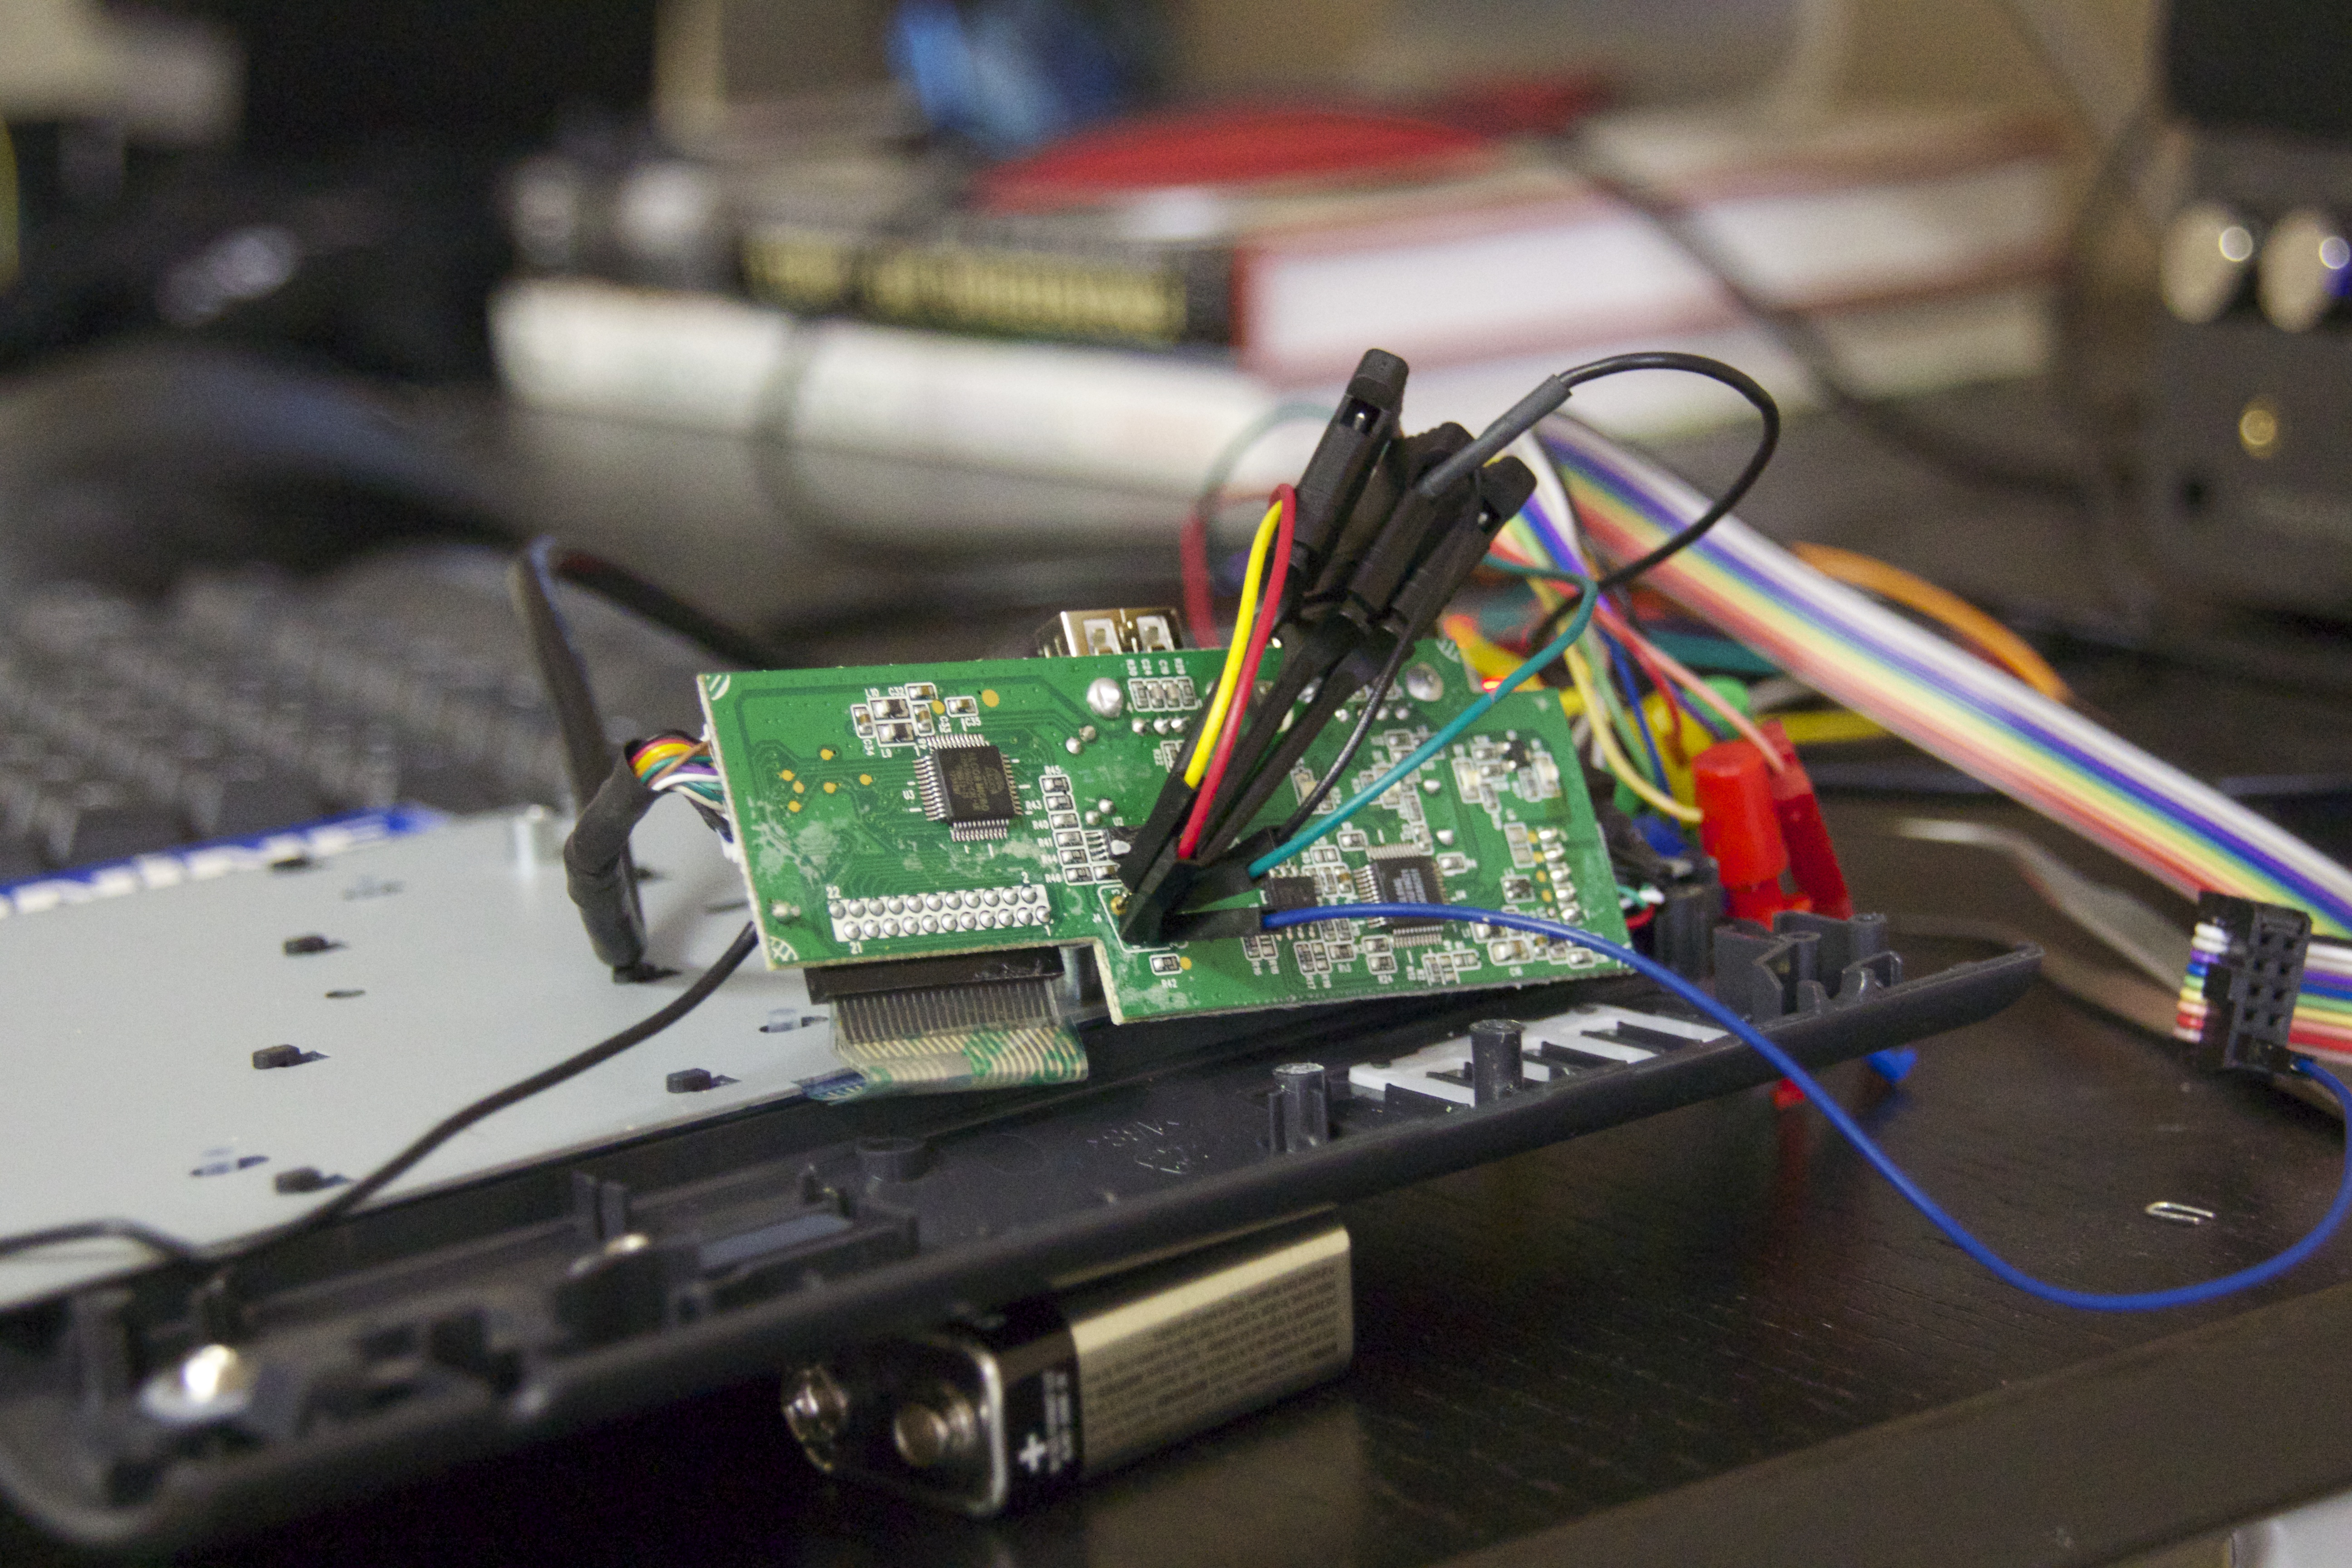
Now that I have a backup of the data, time to start modifying they keys! But no, it didn’t work. I forgot to pull the write protect line low before attempting to write to the EEPROM. Now it works! As a first experiment, I reprogrammed the next song key with “[0xa6 0xA8 0x00 0x00 0x04 0x04]”. Immediately after, pressing the next song key produced ‘a’ characters. Perfect, now I can modify what any key does. (This could be the source of some nasty pranks… but I won’t go there today.)
So the current media key codes are broken… what should I change them to? I have no idea. I spend a good hour or two searching around, trying to figure out what the ‘correct’ code would be, with no luck. I started thinking about how I could brute force all codes until one worked. Fortunately, I didn’t have to. I went back to the USB HID Usage Tables and noticed the ‘Fast Forward’ and ‘Rewind’ keys, which had codes 0xB3 and 0xB4. Could it be that easy? Nah, there’s other bytes which are different in the current configuration. Lets try it anyway… So I programmed these values on the EEPROM: “[0xa6 0xA8 0x03 0xB3 0x00 0x40][0xa6 0xE0 0x03 0xB4 0x00 0x3E]”
Turns out it was that easy! The media keys work now. :) I have no idea what the last byte does, but changing it didn’t seem to affect the key function. So there you have it. Instead of sending my keyboard back for a firmware update, I spent the morning probing around and fixed it. Much more fun, not to mention educational! If there’s anyone else with this problem, I hope this helps!